Transform your home into a stress-free sanctuary with these proven DIY design hacks. Start by painting walls in calming colors like soft blues and gentle greens, then maximize natural light with strategically placed mirrors. Create a personal meditation corner using plush cushions and air-purifying plants. Combat clutter with hidden storage solutions and minimalist floating shelves. Add sound-dampening wall art, set up a cozy reading nook, and implement layered lighting with dimmer switches. Don't forget to arrange your bedroom furniture for ideal flow and peace of mind. These simple changes will put you on the path to a more serene living space.
Create a Calming Color Palette
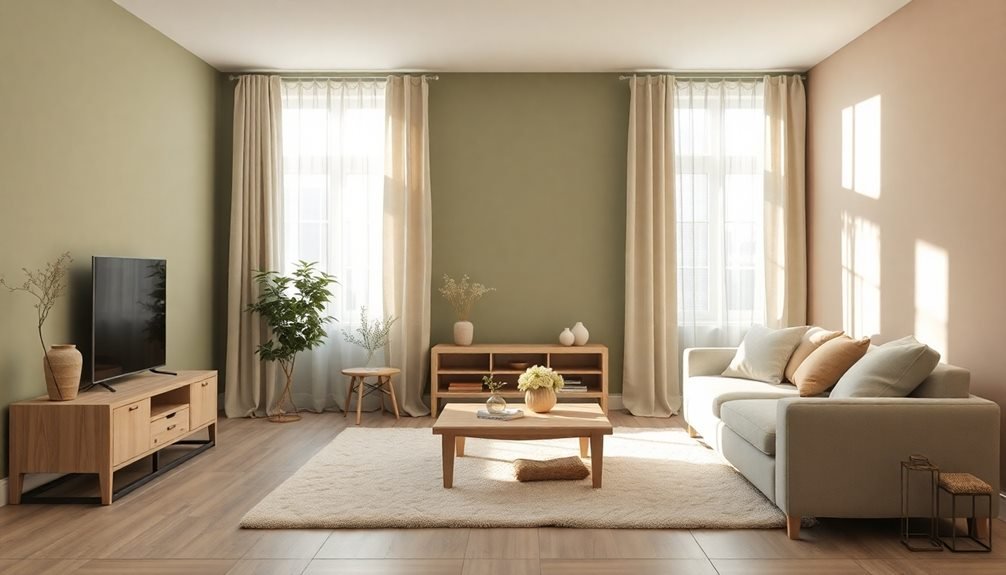
Colors play a powerful role in shaping your emotional well-being at home. To create a stress-free environment, focus on selecting hues that promote relaxation and tranquility.
Start with a base of soft neutrals like warm grays, gentle beiges, or creamy whites for your walls and larger furniture pieces. Layer in nature-inspired colors known for their calming properties. Soft blues reminiscent of clear skies can lower blood pressure and heart rate, while gentle greens mimic peaceful forests and promote feelings of renewal. Incorporate these colors through accent walls, textiles, or artwork.
For added serenity, include muted purples or lavenders, which can help reduce anxiety. Avoid using bold, stimulating colors like bright reds or neons in areas where you want to relax. Instead, reserve these energetic hues for spaces where you need to feel more alert, such as home offices or exercise rooms.
When selecting your palette, stick to the 60-30-10 rule: use your main neutral color for 60% of the room, your secondary color for 30%, and accent colors for the remaining 10%. This balance guarantees a harmonious, stress-reducing environment without overwhelming your senses.
Declutter With Hidden Storage Solutions
Visual chaos can quickly trigger stress and anxiety in your home environment. Combat this by implementing smart, hidden storage solutions that keep your living spaces tidy and organized.
Start by maximizing vertical space with floating shelves behind doors or installing drawer organizers under your bed to store seasonal items.
Transform dead space into functional storage by mounting pull-out cabinets between wall studs or adding raised platforms in children's rooms for under-bed storage.
Don't overlook the potential of stairs – install drawer units within each step or create lift-up treads for storing shoes and accessories.
Make furniture work double-duty by choosing ottomans with interior storage, coffee tables with hidden compartments, or window seats with built-in drawers.
Install tension rods under sinks to hang cleaning supplies, and use magnetic strips inside cabinet doors to store spices or small metal tools.
Create a false bottom in deep drawers to double their capacity, or add slim rolling carts between appliances in your kitchen.
Remember to label everything clearly and group similar items together to maintain organization long-term.
Build Your Personal Meditation Corner

Creating your personal meditation corner starts with choosing a peaceful color scheme of soft blues, gentle greens, or warm neutrals to set the tone for relaxation.
You'll want to include essential mindfulness elements like comfortable floor cushions, a small table for crystals or candles, and perhaps a yoga mat for gentle stretching.
Positioning your meditation space near natural light while incorporating air-purifying plants can enhance your daily mindfulness practice and create a true sanctuary within your home.
Choose Calming Color Palette
A successful meditation corner starts with the right color palette to promote relaxation and inner peace. You'll want to select colors that create a sense of calm while reflecting your personal style. Start with a neutral base like soft white or warm beige, then layer in nature-inspired hues that help ground your space.
Consider painting your meditation corner in soft sage green to connect with nature's healing energy, or choose gentle blue tones that evoke peaceful sky and water elements. Warm lavender and pale blush pink can also create a soothing atmosphere without overwhelming your senses.
If you're working with a small space, lighter shades will help the area feel more open and airy.
Don't forget about texture when selecting your color scheme. Incorporate natural materials like bamboo, jute, or weathered wood in complementary neutral tones. Add depth with textile accessories like cushions or throws in your chosen palette.
Keep patterns minimal and subtle – think tone-on-tone designs or simple geometric shapes. You can also introduce small doses of metallic accents in silver or brass to reflect light and add a subtle shimmer without disrupting the peaceful atmosphere.
Essential Elements For Mindfulness
Setting up a dedicated meditation corner helps establish a daily mindfulness practice and cultivates inner peace. Choose a quiet spot in your home away from high-traffic areas, ideally near a window for natural light and fresh air. Your meditation space doesn't need to be large – even a 4×4 foot area can work perfectly.
Create your mindful sanctuary by incorporating these essential elements:
- Comfortable seating – Select a meditation cushion, floor pillow, or low bench that supports proper posture and allows you to sit comfortably for extended periods.
- Natural elements – Add potted plants, crystals, or a small water fountain to connect with nature and create a sense of tranquility.
- Soft lighting – Use himalayan salt lamps, battery-operated candles, or dimmable LED lights to create a gentle, soothing atmosphere that won't distract your practice.
- Personal touches – Include meaningful items like mala beads, inspiring quotes, or sacred objects that resonate with your spiritual journey and help you maintain focus during meditation.
Keep the space clutter-free and regularly cleanse it with sage or essential oils to maintain its peaceful energy.
Natural Light Maximizing Tricks
Throughout your home, natural light plays an essential role in reducing stress and boosting mood. You can maximize natural illumination through several strategic design hacks that don't require major renovations.
Start by removing heavy drapes and replacing them with sheer curtains or lightweight blinds that allow more sunlight to filter through.
Position mirrors strategically across from windows to reflect and multiply incoming light. You'll double the natural brightness while creating the illusion of more space.
Paint your walls in light, reflective colors like soft whites, pale grays, or cream tones, and consider using glossy finishes to bounce light around the room.
Keep your windows clean and unobstructed – trim back any outdoor vegetation that blocks sunlight, and avoid placing large furniture pieces directly in front of windows.
Install glass doors where possible, and consider adding transom windows above doorways to let light flow between rooms.
You can also maximize brightness by using reflective decorative elements like metallic picture frames, glass coffee tables, or polished hardware.
For darker corners, place small mirrors behind lamps or candles to amplify both natural and artificial light sources.
Sound-Dampening Wall Art

While natural light brightens your space visually, managing sound creates an equally peaceful environment. You can transform ordinary wall art into functional sound-dampening elements that absorb unwanted noise while maintaining your home's aesthetic appeal.
Creating acoustic art panels doesn't require professional expertise, just some basic materials and creativity.
To craft your own sound-dampening wall art, you'll need acoustic foam, decorative fabric, wooden frames, and basic mounting hardware. The key is layering these materials effectively while ensuring they complement your existing décor. You can customize the size, shape, and design to match your space perfectly.
- Create a simple frame using 1×2 lumber, ensuring it's slightly smaller than your chosen fabric.
- Attach acoustic foam to a rigid backing board, then secure it within the frame.
- Wrap your chosen fabric tightly around the frame, securing it on the back with a staple gun.
- Mount your finished piece strategically where sound reflection is most problematic.
Consider placing these panels in areas where noise tends to echo, such as above your sofa, in hallways, or near hard surfaces. They'll reduce sound reverberation while serving as conversation-starting décor pieces.
Indoor Plants Display Strategy
Your indoor plants can thrive in creative vertical arrangements using wall-mounted shelves, hanging baskets, and stackable planters to save floor space.
You'll maximize natural light exposure by positioning sun-loving plants near south-facing windows and grouping shade-tolerant species under indirect light sources.
Creating plant clusters based on similar watering needs and light requirements makes maintenance easier while creating visually appealing green zones throughout your home.
Maximizing Vertical Growing Space
Living with plants doesn't mean sacrificing precious floor space in your home. By thinking vertically, you'll transform unused wall areas into thriving green spaces that add life to your rooms while keeping your floor clear for movement and furniture.
Start maximizing your vertical growing space by implementing these proven strategies:
- Install floating shelves at varying heights to create a dynamic plant display. Position sun-loving plants on upper shelves near windows, and shade-tolerant varieties on lower levels.
- Mount rain gutter planters horizontally along walls for growing trailing plants like pothos, ivy, or string of pearls. These lightweight containers work perfectly for herbs and small succulents too.
- Hang macramé plant holders from ceiling hooks or curtain rods to showcase cascading plants. Stagger the heights to create visual interest and guarantee each plant receives adequate light.
- Use pegboard systems with adjustable brackets to create customizable plant walls. This versatile solution lets you easily rearrange your plants as they grow or when you want to refresh your space.
Remember to secure all mounting hardware into wall studs or use appropriate anchors to support the weight of your plants and containers safely.
Natural Light Placement Tips
Understanding how natural light affects your indoor plants is crucial for their survival and growth. Different plants require varying levels of light exposure, so you'll need to map out your home's natural light patterns before deciding where to place each species.
Place sun-loving plants like succulents, cacti, and tropical flowers within three feet of south-facing windows, where they'll receive direct sunlight for most of the day.
For east-facing windows, position plants that thrive in moderate morning light, such as peace lilies and prayer plants.
West-facing windows work well for plants that can handle afternoon heat, like snake plants and pothos.
If you've got north-facing windows, stick to low-light tolerant species like ZZ plants and Chinese evergreens.
You can also use mirrors strategically to reflect and amplify natural light in darker corners.
For rooms with limited window access, consider installing glass shelves near light sources to allow sunlight to penetrate through to plants on lower levels.
Remember to rotate your plants regularly to promote even growth, and adjust their positions seasonally as the sun's path changes throughout the year.
Easy Plant Grouping Methods
By grouping indoor plants strategically, you'll create stunning visual displays while making maintenance easier. The key is to combine plants with similar care requirements, ensuring they thrive together while simplifying your watering and feeding routines.
Consider light exposure, humidity needs, and growth patterns when creating your plant clusters.
For maximum impact and easy care, follow these proven grouping methods:
- Height-based triangles: Position tall plants like fiddle leaf figs at the back, medium-sized plants like peace lilies in the middle, and trailing pothos or spider plants in front to create depth and visual interest.
- Care clusters: Group plants with matching water needs together – succulents with succulents, tropical plants with other moisture-lovers – to streamline your maintenance schedule.
- Color coordination: Combine plants with similar leaf colors or variegation patterns, like mixing dark-green snake plants with burgundy-colored rubber plants for a cohesive look.
- Growth-rate companions: Place slow-growing plants together and fast-growing varieties in separate groups to maintain balanced displays and reduce frequent rearranging.
Remember to leave enough space between plants for proper air circulation and future growth.
Organize With Minimalist Shelving
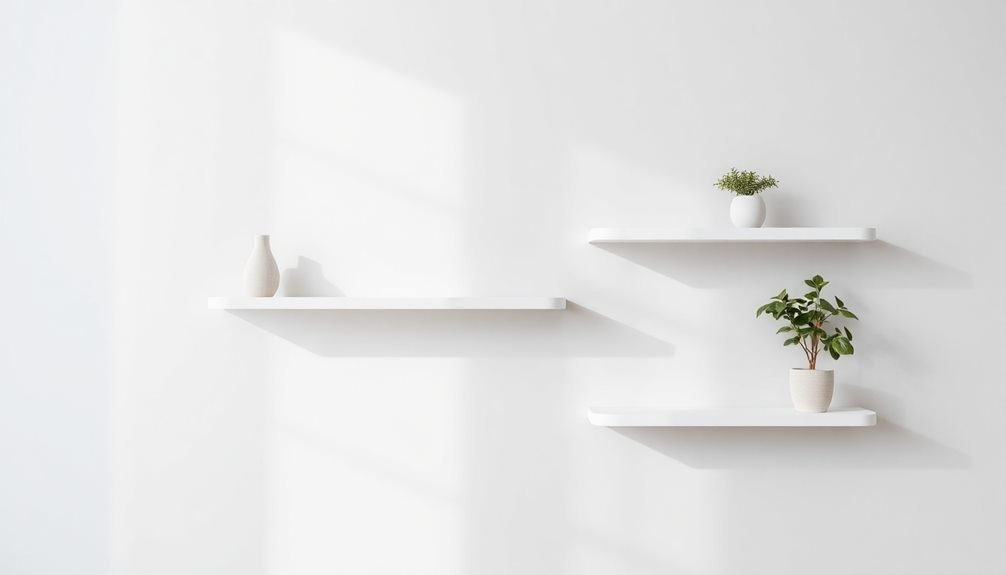
Every space feels calmer when you've got clean, simple shelving that doesn't overpower the room. To achieve this minimalist look, opt for floating shelves with hidden brackets or sleek wall-mounted systems that create a seamless appearance. Choose either white or wood tones to maintain visual harmony, and keep at least 30% of each shelf's surface clear.
When installing minimalist shelves, follow the "rule of thirds" by dividing your wall into three horizontal sections. Install your shelves within the middle section to create balance and draw the eye naturally across the space. Keep items on your shelves curated and purposeful – display no more than five objects per shelf, and group similar items together by height or color.
For maximum functionality, incorporate storage boxes or baskets in neutral tones that blend with your shelving. They'll hide everyday clutter while maintaining the clean aesthetic. Position heavier items toward the ends of each shelf near mounting points, and use museum putty under decorative pieces to prevent shifting.
Remember to dust your minimalist shelves weekly – their simple design means any debris will be immediately noticeable.
Cozy Reading Nook Design
Creating your perfect reading nook starts with smart storage solutions like built-in benches or floating shelves that keep books within arm's reach while maximizing space.
You'll want to layer your lighting with a combination of natural light from nearby windows and targeted task lighting, such as an adjustable reading lamp or wall sconce.
Guarantee maximum comfort by adding plush cushions, a supportive backrest, and a soft throw blanket that invites you to settle in for hours of reading.
Smart Storage Solutions
Inside a well-designed reading nook, storage isn't just functional – it's vital for maintaining a clutter-free sanctuary. You'll want to maximize every inch of space while keeping your favorite books and reading accessories within arm's reach.
Consider incorporating built-in shelving that extends from floor to ceiling, or install floating shelves that create visual interest without consuming precious floor space.
To optimize your reading nook's storage potential, implement these smart solutions:
- Add a storage ottoman or bench that doubles as seating – perfect for stashing blankets, magazines, and seasonal decor while providing extra seating when needed.
- Install narrow pull-out drawers between wall studs to create hidden storage for bookmarks, reading glasses, and electronic devices.
- Mount adjustable shelf brackets to accommodate books of different sizes and create flexible arrangements as your collection grows.
- Incorporate under-window cabinets with soft-close hinges to store larger items while maintaining a clean, seamless look.
Remember to leave some open shelving for displaying cherished books and decorative items, creating a balance between practical storage and aesthetic appeal.
This approach guarantees your reading nook remains both functional and inviting.
Lighting and Comfort Tips
A well-designed reading nook needs more than just smart storage – it demands thoughtful lighting and plush comfort elements to transform it into your favorite retreat.
Start by positioning your nook near a window to maximize natural light during the day, then layer your lighting with a combination of task and ambient sources. Install an adjustable wall sconce or clip-on lamp for focused reading, and add string lights or a small table lamp for a soft, relaxing glow.
Create a cozy seating arrangement with a comfortable armchair or window bench topped with high-quality cushions. You'll want to include a mix of textures – think plush throws, chunky knit blankets, and supportive pillows in varying sizes.
Don't forget to add a small side table or floating shelf for your books, reading glasses, and hot beverages.
Consider installing dimmer switches to control light levels throughout the day, and use warm-toned bulbs (2700-3000K) to create a calming atmosphere.
Add a thick area rug beneath your seating to define the space and absorb sound, making your reading nook feel like a secluded sanctuary within your home.
Mood Lighting Made Simple

Lighting levels can transform your living space from a stress inducer to a calming sanctuary in minutes. By mastering simple mood lighting techniques, you'll create different atmospheres that match your needs throughout the day and help reduce anxiety.
Start by identifying your home's key activity zones and their lighting requirements. You'll want brighter lights for task-oriented spaces like kitchen counters and reading nooks, while softer illumination works better for relaxation areas.
- Install dimmer switches for your main light fixtures – they're affordable, easy to retrofit, and let you adjust brightness instantly to match your mood or time of day.
- Layer your lighting with floor lamps, table lamps, and wall sconces to create depth and eliminate harsh shadows that can cause eye strain.
- Use warm white bulbs (2700-3000K) in living areas and bedrooms to promote relaxation, while saving cooler tones for workspaces.
- Add plug-in LED strip lights behind furniture or under cabinets for a soft, indirect glow that transforms ordinary rooms into cozy retreats.
Position your light sources at different heights to create visual interest and guarantee even illumination throughout your space.
Peaceful Bedroom Layout Tips
Every bedroom deserves a layout that promotes restful sleep and emotional well-being. Start by positioning your bed against the longest wall, away from doors and windows, to create a strong sense of security.
You'll want to make sure you can see the doorway while lying down, as this reduces subconscious stress and anxiety.
Keep your nightstands symmetrical and clutter-free, with just the essentials within arm's reach. Place your dresser on the wall opposite your bed to maintain visual balance and create a natural pathway through the room.
If space allows, establish a small seating area near a window, giving yourself a peaceful spot for morning meditation or evening wind-down.
Don't block the natural flow of movement by cramming furniture against walls. Instead, maintain a clear path around three sides of your bed.
Position mirrors thoughtfully to reflect natural light, but avoid placing them where they'll reflect your sleeping form.
Consider creating a technology-free zone by setting up charging stations outside the bedroom.
Frequently Asked Questions
How Much Should I Budget for a Complete DIY Home Stress-Free Makeover?
You'll need $2,000-$5,000 for a complete DIY home makeover. This covers paint, storage solutions, lighting, décor, and organizational tools. Start small if that's beyond your budget—transform one room at a time.
Can These Design Hacks Work in a Small Apartment or Studio?
Yes, you'll find many design hacks work perfectly in small spaces. Try vertical storage, multi-functional furniture, and light colors to maximize your studio. Don't forget mirrors – they'll make your apartment feel larger.
Which Stress-Reducing Features Add the Most Value to Property Resale?
You'll boost your property value most by adding spa-like bathroom features, natural lighting, built-in storage solutions, and neutral color schemes. These stress-reducing elements attract buyers who'll pay more for move-in ready zen spaces.
Are There Child-Friendly Alternatives for Zen Home Design Elements?
You'll find kid-safe zen alternatives like soft floor cushions, rounded furniture edges, washable wall paint, natural lighting, and non-toxic plants. Don't forget child-height peace corners with sensory elements they can safely explore.
How Often Should Stress-Reducing Home Features Be Updated or Maintained?
You'll want to refresh stress-reducing elements every 3-6 months. Clean calming water features weekly, replace aromatherapy oils monthly, and update your décor seasonally to maintain their effectiveness in reducing stress.
In Summary
You'll find that implementing these DIY design hacks transforms your home into a serene sanctuary. Start with one project at a time, and you'll gradually create spaces that help melt away daily stress. Whether you're maximizing natural light, crafting cozy nooks, or adding clever storage solutions, these simple changes will make a significant impact on your home's atmosphere and your overall well-being.


Leave a Reply