Looking to refresh your furniture without breaking the bank? You'll love these five therapeutic makeover projects. Start by reupholstering your desk chair with fresh fabric for an instant office upgrade. Transform that tired dresser with new paint and hardware for a dramatic change. Give wooden side tables new life with a simple paint job and updated finish. Breathe new energy into a classic rocking chair through careful restoration and finishing. Finally, revitalize your bedroom by recovering your headboard with luxurious fabric. These satisfying DIY projects won't just beautify your space – they'll calm your mind as you watch each piece transform.
Simple Desk Chair Reupholstery

Most desk chairs can be transformed with basic reupholstery skills and a few simple tools. You'll need a screwdriver, pliers, staple gun, fabric scissors, and your chosen upholstery fabric.
Start by flipping the chair over and removing all screws holding the seat cushion in place. Take photos of the original assembly to reference later.
Remove the old fabric carefully, noting how it was attached. Keep the existing foam if it's in good condition, or replace it with new high-density foam cut to size.
Iron your new fabric and lay it pattern-side down on a flat surface. Center the seat cushion foam-side down on the fabric, leaving enough material to wrap around the edges.
Pull the fabric tight and secure it with staples, starting from the center of each side and working toward the corners. Create neat corners by folding the fabric like you're wrapping a present.
Trim excess fabric, leaving enough to prevent fraying. Reattach the seat to the chair frame, ensuring all screws are tight.
You've now given your desk chair a fresh look that'll last for years.
Transform an Old Dresser
Three key steps can transform a tired old dresser into a stunning piece of furniture: cleaning, repairing, and refinishing. Start by thoroughly cleaning the dresser with a degreasing solution to remove decades of dirt and grime.
Fix any loose joints, replace broken drawer slides, and fill holes or scratches with wood filler. Once repairs are complete, sand all surfaces to create a smooth foundation for your new finish.
Before you begin the transformation, gather these essential supplies:
- Quality paintbrush or foam roller for even application
- Primer designed for wood surfaces
- Paint or stain in your chosen color
- Clear protective topcoat for durability
You'll need to remove all hardware and drawer pulls, keeping them in a safe place if you plan to reuse them.
Apply primer in thin, even coats, allowing proper drying time between applications. Follow with your chosen paint or stain, applying multiple thin coats for best results.
Don't rush the process – each layer needs adequate drying time. Finally, protect your work with a clear topcoat, and install new or restored hardware for a polished look.
Painting Wooden Side Tables

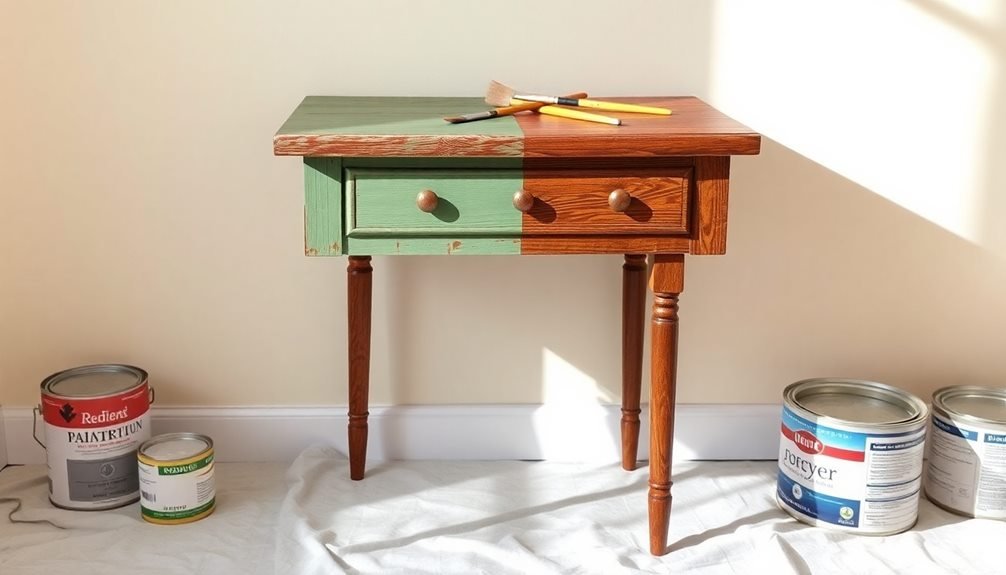
Simple wooden side tables present perfect opportunities for dramatic transformations through paint. Before you begin, remove any hardware and sand the surface thoroughly to guarantee proper paint adhesion. Wipe away dust with a tack cloth and apply a quality primer designed for wooden surfaces.
Choose your paint color and finish based on your room's aesthetic. You'll want to use either chalk paint, which doesn't require primer, or latex paint with a built-in primer for the best results.
Apply thin, even coats using a foam roller for flat surfaces and an angled brush for details and corners. Let each coat dry completely before adding another.
For added protection, seal your newly painted table with a clear polyurethane topcoat. If you're feeling creative, try color blocking, stenciling patterns, or adding geometric designs with painter's tape. You can also create texture by dry brushing or using specialty finishes like metallic paint.
Don't forget to reattach hardware once everything's completely dry. If the original pulls don't match your new look, replace them with updated options that complement your table's fresh appearance.
Rocking Chair Revival Project
While rocking chairs often show their age through worn finishes and loose joints, restoring these cherished pieces can breathe new life into your home's decor.
You'll need basic tools like a screwdriver, wood glue, sandpaper, and your choice of paint or stain to transform your tired rocker into a stunning statement piece.
Start by disassembling the chair, labeling each part for easy reassembly. Check for loose spindles, worn runners, and damaged joints.
You'll want to repair these structural issues before moving on to the cosmetic updates. Sand all surfaces thoroughly to remove old finish and create a smooth base for your new finish.
Here's your step-by-step restoration process:
- Apply wood glue to loose joints and clamp them for 24 hours
- Replace any damaged wood pieces, matching the original wood type
- Sand progressively with 80, 120, and 220-grit sandpaper
- Apply your chosen finish in thin, even coats
Once you've completed these steps, you'll need to let your rocking chair cure completely before use.
Consider adding a cushion or pillow to complement your newly restored piece and enhance comfort.
Headboard Fabric Refresh

Transforming an outdated headboard with fresh fabric can dramatically change your bedroom's appearance without the expense of buying new furniture.
You'll need upholstery fabric, a staple gun, scissors, pliers, and a screwdriver to complete this project in under two hours.
Start by removing the headboard from your bed frame and stripping off the old fabric. Keep the existing foam padding if it's in good condition, or replace it with new high-density foam.
Lay your chosen fabric face-down on a clean surface, place the headboard on top, and cut the fabric with a 3-inch overhang on all sides.
Pull the fabric tight and secure it with staples, working from the center outward. Pay special attention to corners, where you'll need to fold the fabric neatly for a professional finish.
Remove any loose threads or excess fabric with scissors. If your headboard has buttons, mark their positions and create new fabric-covered buttons using a kit from your local craft store.
Reattach the headboard to your bed frame, and you've got a custom piece that looks brand new. This refresh works particularly well with simple rectangular or curved headboards.
Frequently Asked Questions
How Long Should I Let Furniture Pieces Cure After Painting Them?
You'll need to let painted furniture cure for 24-72 hours in a well-ventilated space. For heavy-use pieces, wait up to 30 days for full hardening, though you can lightly use them after 24 hours.
What Safety Precautions Should I Take When Sanding Old Painted Furniture?
You'll need to wear a respirator mask, safety goggles, and gloves when sanding old furniture. Work in a well-ventilated area, as older paint may contain lead. Don't forget to vacuum the dust afterward.
Can Outdoor Furniture Makeovers Use the Same Techniques as Indoor Pieces?
You'll need different techniques for outdoor furniture since it faces harsher conditions. Use weather-resistant paints, sealants, and primers specifically made for exterior use to guarantee your makeover withstands sun, rain, and temperature changes.
Which Furniture Pieces Should Beginners Avoid Attempting to Restore?
You'll want to avoid restoring antiques, intricate carved pieces, and family heirlooms as a beginner. Also skip expensive or structurally damaged furniture until you've gained more experience with simpler projects.
How Can I Estimate the Total Cost Before Starting a Makeover?
You'll need to list all materials like paint, sandpaper, and tools, then research their prices. Don't forget to factor in protective gear, cleaning supplies, and extra materials for potential mistakes.
In Summary
You'll find that furniture makeovers don't just refresh your living space – they refresh your mind. Whether you're reupholstering a desk chair, transforming a dresser, painting side tables, reviving a rocking chair, or updating a headboard, these projects offer a satisfying creative outlet. Take control of your environment and your mindset by diving into one of these simple transformations. You'll love watching your old pieces come back to life.


Leave a Reply