Transform your anxiety into creativity through therapeutic garden upcycling projects. You'll find peace in converting everyday items like tin cans, glass bottles, and wooden pallets into beautiful garden features. Start by creating a dedicated crafting zone where you can mindfully sort materials and plan your designs. These hands-on activities help ground your thoughts while building a sustainable outdoor sanctuary. From vertical herb gardens to illuminated bottle borders, each project offers both creative expression and stress relief. Your journey to mental well-being grows stronger with every repurposed piece you add to your garden space.
Understanding Mindful Garden Creation
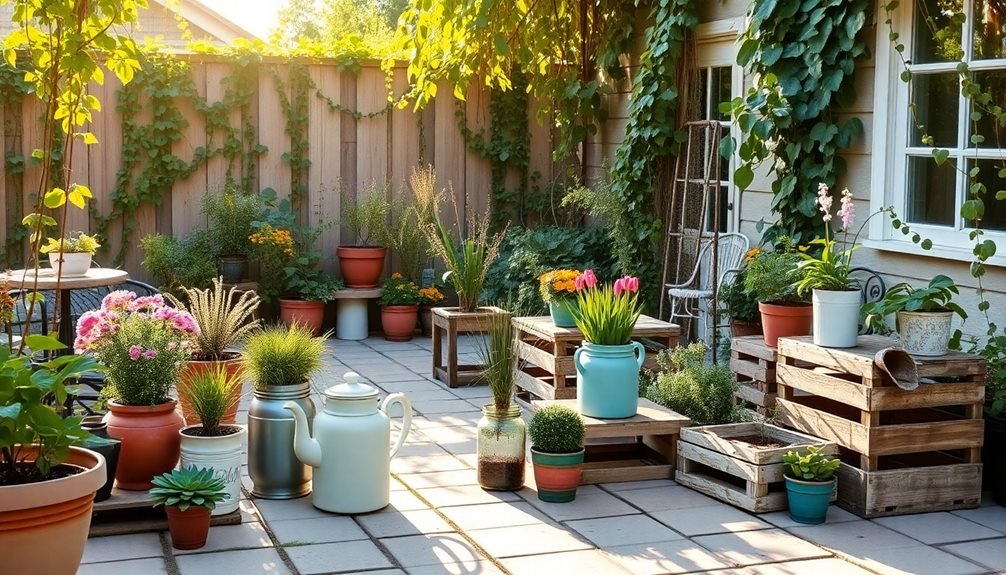
Many gardeners overlook the mindful aspects of creating an upcycled garden space. When you approach garden crafting with intention, you'll discover it's more than just repurposing old items – it's a therapeutic practice that can calm your anxious thoughts and ground you in the present moment.
Start by observing your available materials with fresh eyes. That cracked teapot isn't just waste; it's a potential succulent planter. The rusty bicycle rim could become a climbing frame for morning glories. As you handle each item, focus on its texture, weight, and potential. This sensory engagement helps quiet racing thoughts and promotes mindfulness.
You'll want to plan your upcycled garden with purpose. Consider how each repurposed piece will contribute to the overall atmosphere.
Creating zones for different activities – meditation, crafting, or reading – helps establish a meaningful connection with your space. Position items thoughtfully, ensuring they're both functional and visually harmonious.
Essential Tools and Materials
While creating upcycled garden crafts requires creativity, you'll also need some basic tools and materials to bring your vision to life. Start with essential hand tools: pruning shears, a utility knife, pliers, wire cutters, and a sturdy pair of scissors.
You'll also want a hammer, screwdriver set, and measuring tape for construction projects.
Keep a collection of fastening materials handy, including garden twine, wire, wood glue, and weatherproof adhesive. Don't forget screws, nails, and zip ties in various sizes.
For painting and finishing, stock up on outdoor paint, clear sealant, and rust-resistant spray paint.
Your upcycling success depends on gathering potential craft materials. Save glass jars, plastic containers, wooden pallets, and old furniture pieces.
Collect tin cans, broken pottery, unused garden tools, and discarded kitchen items. You'll want natural materials too – gather fallen branches, pine cones, and smooth stones.
Store your supplies in clearly labeled containers, and keep a basic tool kit easily accessible.
Consider dedicating a workspace where you can leave projects in progress without disruption.
Remember to wear safety gear like gloves and protective eyewear when working with tools.
Tin Can Herb Gardens
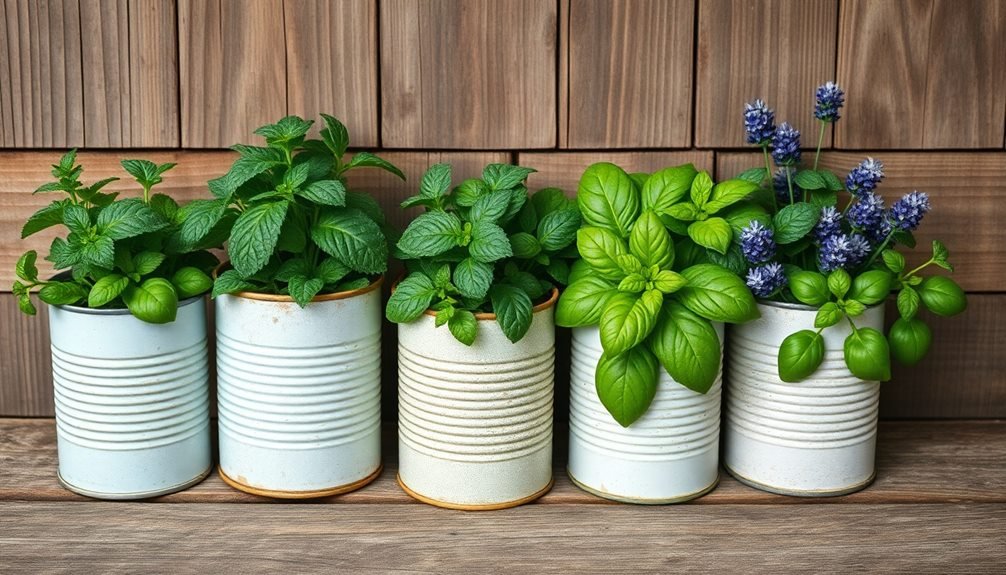
You'll want to clean and roughen your tin cans before applying primer and exterior paint to prevent rust and create an attractive finish.
To guarantee proper drainage, punch several holes in the bottom of each can using a hammer and nail, or create a layer of gravel before adding potting soil.
When selecting herbs for your upcycled containers, group plants with similar water and sunlight needs together, such as placing Mediterranean herbs like rosemary and thyme in the same can.
Paint and Prep Steps
Before painting your salvaged tin cans, proper preparation guarantees a long-lasting and attractive finish. Start by removing any paper labels and adhesive residue using warm, soapy water and a scraper. For stubborn glue, apply vinegar or cooking oil, let it sit for 15 minutes, then scrub clean. Thoroughly wash the cans' interiors and exteriors, removing any food residue.
Next, sand the entire surface with medium-grit sandpaper to create texture for paint adhesion. Don't forget to smooth sharp edges around the rim for safety. Using a nail and hammer, punch several drainage holes in the bottom of each can. Wipe away metal dust with a damp cloth and let dry completely.
Apply a metal primer specifically designed for aluminum or tin surfaces. You'll need two thin coats, allowing each to dry fully.
Once primed, paint your cans with rust-resistant outdoor paint. Choose spray paint for even coverage or brush-on acrylic for detailed designs. Apply 2-3 light coats rather than one thick layer, waiting 30 minutes between applications.
After 24 hours of curing, seal with clear waterproof coating for weather protection.
Creative Drainage Solutions
Proper drainage throughout tin can herb gardens prevents root rot and secures healthy plant growth. You'll need to create several drainage holes in the bottom of each can using a hammer and nail or an electric drill with a small metal bit. Space the holes about 1 inch apart in a grid pattern for even water distribution.
To enhance drainage further, add a 1-inch layer of small rocks or broken pottery pieces at the bottom of each can. This creates a reservoir that prevents soil from clogging the drainage holes while allowing excess water to escape.
You can also mix perlite or coarse sand into your potting soil at a ratio of 1:4 to improve overall drainage capacity.
If you're worried about water damage to surfaces, create simple DIY drip trays using plastic jar lids or repurposed shallow containers. Elevate your cans slightly by placing them on small stones within the drip trays – this prevents standing water from being reabsorbed into the soil and promotes continuous airflow beneath the containers.
Companion Planting Tips
Three key companion planting principles make tin can herb gardens thrive.
First, pair tall herbs like rosemary or sage with shorter, trailing plants such as thyme or oregano to maximize vertical space in your upcycled containers. You'll create a natural cascade effect while ensuring each plant gets adequate sunlight and air circulation.
Second, group herbs with similar water needs together in the same tin can. Mediterranean herbs like basil, oregano, and marjoram prefer well-drained soil and moderate watering, while moisture-loving plants like mint and parsley should share their own container.
This prevents overwatering some plants while underwatering others.
Glass Bottle Garden Borders
Creating garden borders out of recycled glass bottles adds both visual interest and eco-friendly charm to your outdoor spaces. By burying bottles neck-down in the soil, you'll form a distinctive boundary that catches sunlight and creates beautiful patterns throughout your garden.
To start your bottle border, collect clean glass bottles in various colors and sizes. You'll need to remove all labels and thoroughly wash each bottle.
Dig a trench about 6-8 inches deep along your intended border line, making sure it's wide enough to accommodate the bottle widths. Position each bottle upside down, nestling them closely together for stability. You can alternate colors or create specific patterns for added visual appeal.
For extra security, you can add cement or gravel around the bottles' necks before backfilling with soil. Space bottles evenly, leaving about 1-2 inches between each one to prevent breakage from expansion and contraction during temperature changes.
Consider using LED solar lights behind your bottle border to create a magical evening display. Remember to inspect your border periodically for any damage and replace broken bottles promptly to maintain safety.
Pallet Vertical Planters
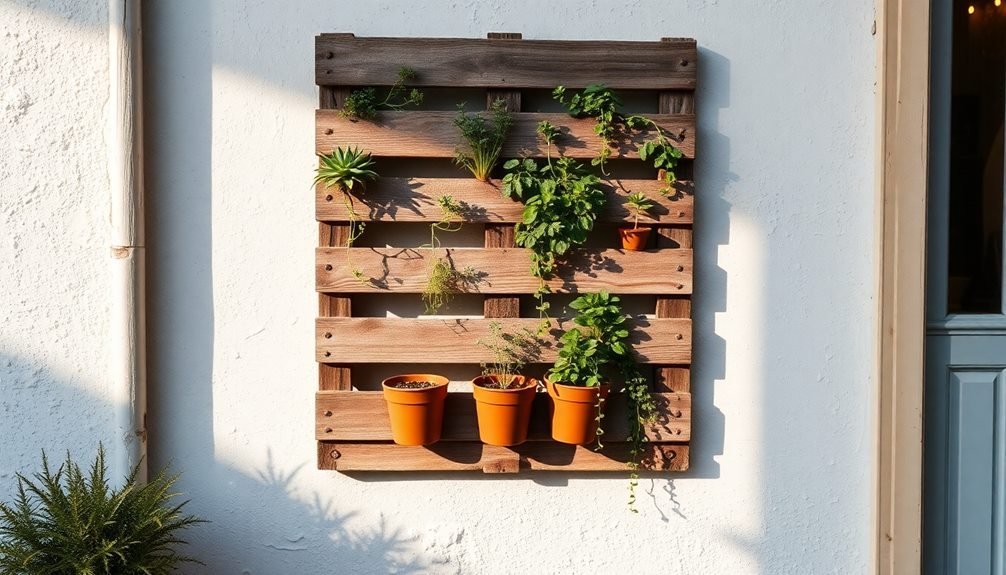
If you're short on garden space, you'll love transforming a wooden pallet into a vertical planter that maximizes growing area on any wall or fence.
The assembly process requires just a few basic tools – secure landscape fabric to the back, fill the openings with soil, and plant your favorite herbs or flowers between the slats.
You can mount your completed pallet planter vertically or lean it at an angle, creating an instant garden that takes up minimal ground space while providing multiple planting pockets.
Simple Assembly Steps
Building a vertical planter from a recycled pallet takes just a few straightforward steps. First, clean your pallet thoroughly with soap and water, then sand any rough spots to prevent splinters.
Once it's dry, apply a non-toxic wood sealant to protect against moisture and extend its lifespan.
Next, lay the pallet flat and attach landscape fabric to the back using a staple gun. This creates pockets for soil while allowing proper drainage.
Create individual planting compartments by stapling additional strips of fabric horizontally between the slats. Double-check that all staples are secure and the fabric is pulled taut.
You'll need to fill each pocket with potting soil, working from bottom to top. Pack the soil firmly but not too tightly – you want roots to have room to grow.
Insert your chosen plants through small slits cut in the fabric, ensuring their roots are well-covered with soil.
Space-Saving Growing Solutions
Vertical pallet planters offer an ingenious solution for gardeners with limited outdoor space. You'll need to transform a wooden pallet into a living wall of greenery by securing planting pockets along its surface.
These versatile structures can hold herbs, succulents, or trailing plants while taking up minimal ground space. To maximize your growing area, you'll want to position the pallet against a sunny wall or fence.
Line each shelf with landscape fabric to create individual planting compartments, ensuring proper drainage while containing the soil. You can customize the depth of these pockets based on your chosen plants' root systems.
Consider organizing your plants strategically: place sun-loving varieties at the top and shade-tolerant species below. You'll find that herbs like basil, thyme, and mint thrive in these vertical gardens, while strawberries and lettuce work well in the lower sections.
Don't forget to install a drip irrigation system or remember to water from top to bottom, letting excess moisture trickle down through the levels.
This space-efficient design doesn't just save room – it creates an eye-catching focal point that transforms bland walls into productive growing spaces.
Meditative Upcycling Garden Practices
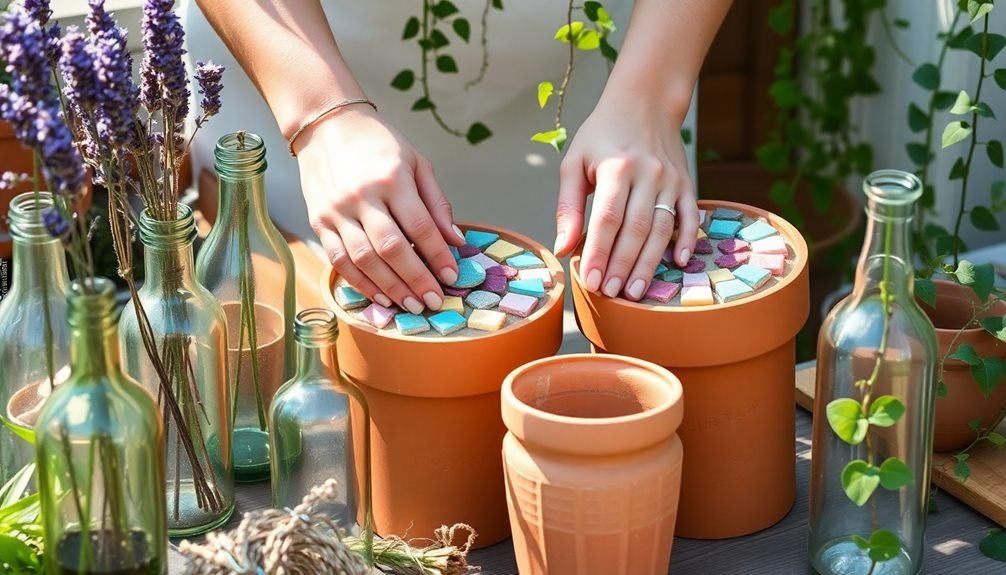
Through mindful garden upcycling, you'll discover a peaceful way to repurpose old materials while connecting with nature. As you transform discarded items into garden treasures, focus on each breath and movement, letting your creativity flow naturally. This mindful practice combines eco-friendly gardening with stress relief.
| Activity | Materials Needed | Mindful Focus |
|---|---|---|
| Bottle Planters | Glass/Plastic Bottles | Cutting Precision |
| Stone Stacking | Found Rocks/Pebbles | Balance/Patience |
| Twig Weaving | Fallen Branches | Pattern Making |
When you're upcycling, treat each project as a meditation session. As you paint an old tire for a flower bed, notice the texture beneath your fingers and the smooth strokes of your brush. While weaving twigs into a natural trellis, pay attention to the way each piece fits together. You'll find that sorting materials becomes a grounding exercise – organizing glass pieces by color for mosaics or arranging pebbles for garden borders helps quiet a racing mind. Transform your garden workspace into a mindfulness sanctuary where every recycled creation becomes part of your therapeutic journey.
Frequently Asked Questions
Can Upcycled Garden Crafts Help With Specific Mental Health Conditions Besides Anxiety?
Yes, you'll find garden upcycling can help with depression, PTSD, and stress by providing mindful focus, boosting self-esteem through completion of projects, and offering a creative outlet for emotional expression.
What Safety Precautions Should I Take When Working With Broken Glass?
Always wear thick gloves, safety goggles, and closed-toe shoes when handling broken glass. You'll need to work in a well-ventilated area and keep a first-aid kit nearby. Don't forget to dispose safely.
How Long Does It Take to See Therapeutic Benefits From Garden Crafting?
You'll likely notice reduced stress within your first crafting session. However, regular practice over 2-3 weeks helps establish lasting benefits. It's different for everyone, but consistency's key to experiencing therapeutic effects.
Are There Weather-Resistant Sealants Safe for Growing Edible Plants in Upcycled Containers?
You'll want to use food-grade sealants like linseed oil, beeswax, or mineral oil. Don't use chemical wood sealers or polyurethane near edible plants. Natural oil finishes are safe and weather-resistant for your garden containers.
Can Children Participate in Upcycled Garden Crafting Under Adult Supervision?
Yes, you'll find many kid-friendly garden crafts that children can safely do with supervision. Let them paint pots, arrange rock gardens, or plant seedlings – just make certain they're using child-safe materials and tools.
In Summary
You've discovered how therapeutic garden upcycling can calm your anxious mind while creating something beautiful. Whether you're transforming tin cans into herb gardens or arranging glass bottles for unique borders, each project offers a mindful escape. Don't forget to breathe, take your time, and enjoy the process. Your upcycled garden isn't just environmentally friendly – it's a peaceful sanctuary you've crafted with your own hands.


Leave a Reply