Transform your cluttered space into an organized haven with these stress-relieving DIY storage projects. You'll love rolling under-bed boxes for seasonal items, floating corner shelves for stylish displays, and pegboard organizers for versatile storage. Create a cozy fabric storage bench that doubles as seating, or install space-saving mason jar cabinets in your pantry. Don't forget wooden crate bookshelves, hidden staircase drawers, and door-mounted racks for maximum efficiency. You can even build stackable cube units for modular organization. These simple projects will help you reclaim your space and restore your peace of mind, with plenty more solutions to explore.
Rolling Under-Bed Storage Boxes

Making use of the empty space beneath your bed transforms wasted areas into valuable storage. These DIY rolling storage boxes offer an efficient solution for organizing seasonal clothing, extra bedding, or rarely used items while keeping them dust-free and easily accessible.
To create these boxes, you'll need plywood or medium-density fiberboard (MDF), heavy-duty casters, wood screws, and a waterproof sealant. Cut the wood to match your bed's underspace dimensions, leaving a 2-inch clearance for smooth movement.
Assemble the box using wood glue and screws, ensuring all corners are square. Install the casters on the bottom, positioning them about 2 inches from each corner for ideal stability.
Add handles to the front panel for easy pulling, and consider installing dividers inside to separate different items. Apply sealant to protect against moisture and dust.
You can customize the height of your boxes, but keep them 2-3 inches shorter than your bed's clearance. Paint or stain the boxes to match your bedroom's decor, and label them clearly to track contents.
These storage solutions maximize your bedroom's organization while maintaining a clutter-free appearance.
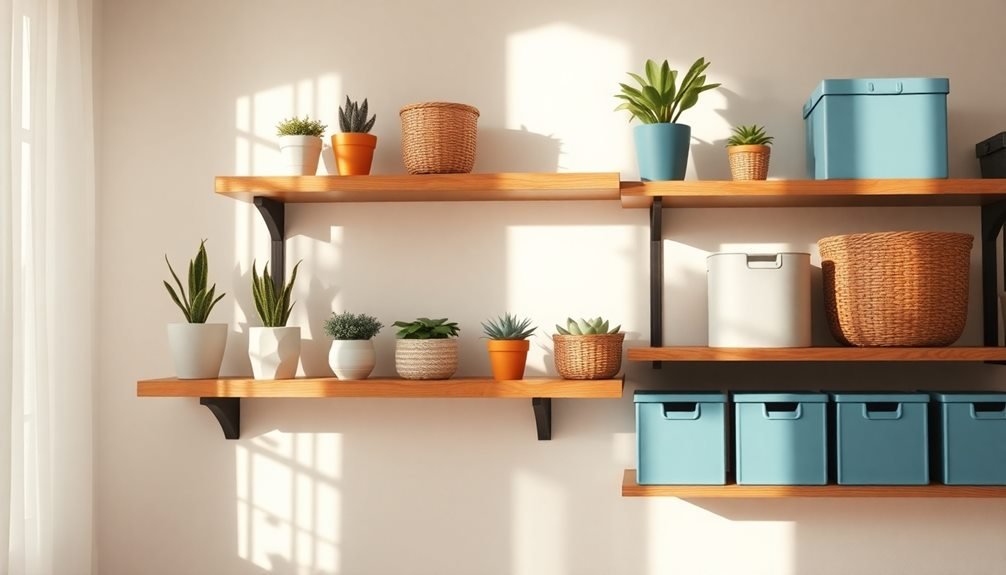
Floating Corner Shelf System
Building floating corner shelves lets you transform empty wall angles into stylish storage spaces with just a few basic tools and materials.
You'll maximize vertical space by installing these modern shelves in a triangular configuration that fits snugly into any room's corner.
Once installed, you can arrange books, plants, photos, and decorative items on your new corner shelves to create an eye-catching display that's both functional and aesthetically pleasing.
Easy Installation Steps
With just a few basic tools and careful measurements, installing a floating corner shelf system can transform an unused corner into valuable storage space. You'll need a power drill, level, stud finder, screwdriver, pencil, and the shelf mounting hardware that came with your system.
Before beginning, locate and mark the wall studs in your chosen corner – they'll provide essential support for your shelves.
- Start by measuring and marking your desired shelf heights, ensuring they're level across both walls. Don't forget to account for items you'll store on each shelf.
- Drill pilot holes into the studs at your marked locations, then attach the mounting brackets firmly. If you can't hit a stud, use appropriate wall anchors rated for your shelf's weight capacity.
- Slide the shelf onto the mounted brackets, making sure it's fully secured and level. Some systems require you to tighten set screws to lock the shelf in place.
- Test each shelf's stability by applying gentle pressure before placing any items. If there's any wobble, double-check your mounting hardware and tighten as needed.
Remember to work methodically and verify your measurements twice before drilling. A properly installed floating corner shelf system should feel solid and secure.
Space-Maximizing Corner Design
Floating corner shelf systems exemplify smart spatial design by transforming often-wasted corner spaces into functional storage areas. You'll maximize your room's potential by installing these sleek triangular shelves that fit snugly into corners, creating an elegant storage solution that doesn't overwhelm your space.
| Feature | Benefit |
|---|---|
| Triangular Design | Fits perfectly in 90-degree corners |
| Graduated Sizes | Creates visual interest and balance |
| Hidden Brackets | Provides clean, floating appearance |
| Weight Distribution | Supports up to 25 lbs per shelf |
When planning your corner shelf system, you'll want to take into account both form and function. Start with larger shelves at the bottom, gradually decreasing in size as you move upward. This arrangement not only looks appealing but also guarantees proper weight distribution. The key to success lies in precise measurements and secure mounting – your shelves should extend equally on both walls, typically 12-16 inches on each side.
Choose materials that complement your room's aesthetic, whether it's solid wood for a traditional look or tempered glass for modern appeal. Don't forget to incorporate LED strip lighting underneath each shelf to add ambiance and highlight your displayed items.
Styling Your Corner Shelves
Successfully styling your corner shelves requires a thoughtful balance between aesthetics and functionality. Begin by grouping similar items together and varying the heights of your displays to create visual interest.
Consider the weight distribution of objects, placing heavier items on lower shelves and lighter ones toward the top for both stability and visual harmony.
When selecting items for your corner shelves, focus on pieces that serve both decorative and practical purposes. Mix books with decorative bookends, combine storage boxes with small plants, and incorporate meaningful personal items that reflect your style while maintaining organization.
- Create depth by placing taller items toward the corner and shorter ones toward the front, establishing a natural visual flow.
- Maintain negative space between objects to prevent a cluttered appearance and make each item stand out.
- Use odd-numbered groupings (three or five items) to achieve a more visually appealing arrangement.
- Rotate seasonal decor while keeping essential storage items in place for year-round functionality.
Remember to step back periodically as you arrange items, ensuring your styling looks balanced from different angles in the room.
Adjust the placement of objects until you achieve a cohesive look that serves your storage needs.
Pegboard Wall Organizer

A pegboard wall organizer lets you create customizable storage space using basic materials like a pegboard sheet, mounting hardware, and various hooks and accessories.
You'll need a drill, level, stud finder, and screwdriver to properly mount the pegboard to your wall studs for maximum stability.
Once installed, you can arrange hooks, baskets, and shelves to store tools, craft supplies, kitchen items, or office essentials in a way that works best for your space.
Materials and Tools Needed
Building a pegboard wall organizer requires several essential materials and tools for proper installation. You'll need a pegboard panel as your base, which comes in various sizes and materials like hardboard or metal. Make sure you've got furring strips to create the necessary spacing between the wall and pegboard, allowing hooks to slide in easily.
Don't forget to pick up pegboard hooks and accessories that match your specific storage needs.
- Sturdy pegboard panel (typically 24"x48" or 48"x96")
- 1×2 inch furring strips for wall mounting
- Various pegboard hooks, bins, and holders
- Basic tool set: drill, level, pencil, measuring tape, and screws
You'll also need proper wall anchors if you're not mounting directly into studs. Choose anchors rated for the weight you're planning to store.
When selecting your pegboard accessories, consider getting a mix of different hook styles and storage solutions – straight hooks, curved hooks, baskets, and shelves. This variety will give you maximum flexibility in organizing your tools and supplies.
Remember to grab some washers to prevent the hooks from pulling through the holes over time.
Step-by-Step Installation Guide
Installing your pegboard wall organizer involves six key steps that guarantee proper mounting and stability.
First, measure your wall space and mark the locations where you'll attach the frame, ensuring it aligns with the wall studs. Cut your 1×2 furring strips to create a frame that matches your pegboard's dimensions.
Next, mount the furring strips to the wall studs using 2½-inch wood screws, spacing them 16 inches apart. You'll need to maintain a ½-inch gap between the wall and pegboard to accommodate the hooks.
Position your pegboard over the mounted frame and secure it using 1-inch wood screws at each corner and along the edges every 12 inches.
Before adding your hooks and accessories, prime and paint your pegboard if desired. Once dry, install your pegboard hooks, baskets, and shelves. Start with larger items at the bottom and work your way up, keeping frequently used tools at eye level.
Test each hook's stability by gently pulling outward. If any hooks feel loose, reposition them slightly or reinforce the pegboard mounting at that spot.
Creative Storage Ideas
Three creative applications make pegboard wall organizers invaluable for any space. You'll find them perfect for your home office, craft room, or garage workshop. These versatile organizers maximize vertical space while keeping your tools and supplies easily accessible.
With proper installation and a few specialized hooks, you can transform any wall into a customizable storage solution.
- Create a kitchen utensil display by hanging pots, pans, and cooking tools, freeing up valuable cabinet space.
- Design a crafting station with removable bins, baskets, and specialized holders for scissors, ribbons, and supplies.
- Set up a garage tool wall that keeps everything visible and within arm's reach.
- Install a home office organizer for files, supplies, and tech accessories.
You can paint your pegboard to match your décor or create striking contrast with bold colors.
Add shelving units between the pegs for items that need flat surfaces.
Consider installing LED strip lighting above or below the board to illuminate your workspace.
Fabric Storage Bench
A stylish fabric storage bench serves up to three essential functions: seating, storage, and decorative appeal.
You'll find this versatile piece particularly useful in entryways, bedrooms, or living rooms where space optimization is vital. The hidden storage compartment beneath the seat lets you store seasonal items, blankets, or children's toys while maintaining a clutter-free environment.
To build your fabric storage bench, you'll need plywood for the base and sides, hinges for the lid, foam padding, fabric of your choice, and basic tools.
Start by constructing a simple box frame, ensuring it's sturdy enough to support sitting weight. Add support beams underneath for extra stability. Create the lid slightly larger than the box to allow for padding overflow.
Cut your foam to size, leaving extra inches for wrapping. Layer batting over the foam for a smoother finish, then cover with your chosen fabric, pulling it taut and securing with a staple gun.
Attach the hinges to connect the lid to the base, and add safety hinges to prevent accidental closing. You can enhance the design by adding decorative nail heads or piping along the edges.
Mason Jar Cabinet Solutions

Mason jar cabinet solutions frequently transform cluttered pantry spaces into organized storage systems that showcase your dry goods, spices, and crafting supplies.
By installing under-shelf mounting brackets or dedicated jar racks, you'll maximize vertical space while keeping everything visible and accessible. You can label each jar's contents using chalkboard paint, vinyl stickers, or etched glass techniques for a cohesive, aesthetic look.
- Create a sliding jar rack by mounting wooden planks with routed grooves underneath your existing shelves, allowing jars to glide smoothly.
- Install a pegboard wall system with adjustable hooks and shelf brackets to accommodate different jar sizes and arrange them in functional groupings.
- Convert cabinet doors into jar storage by adding wooden frames with secure metal rings sized for standard mason jar mouths.
- Build a pull-out drawer system with divided compartments specifically sized for various jar heights.
When planning your mason jar storage, measure your cabinet depths and heights carefully to guarantee proper clearance.
Consider using different jar sizes based on your typical portion needs, and don't forget to incorporate adequate lighting to easily locate items. Regular maintenance of rubber seals will keep your jars airtight and your ingredients fresh.
Rope Basket Weaving Project
Rope baskets offer another creative storage solution that brings natural textures into your home organization system. You'll need cotton rope, fabric glue, and scissors to create these versatile containers that can store everything from blankets to children's toys.
Start by coiling the rope into a tight spiral for the base, securing it with fabric glue as you work. Once you've created a base that's 6-8 inches wide, begin building the walls by stacking coils vertically. Keep the rope rows tight and even, applying glue between each layer to maintain structural integrity.
You can shape the basket by adjusting how you position each new coil – straight up creates cylindrical walls, while angling outward creates a bowl shape. For added stability, weave supporting strands horizontally through the vertical coils every few inches.
You'll want to maintain consistent tension throughout the weaving process to guarantee your basket holds its shape. Once you've reached your desired height, secure the final row with extra glue and trim the rope at an angle for a clean finish.
Wooden Crate Bookshelf

Transform old wooden crates into a charming bookshelf that's both functional and rustic. This budget-friendly project lets you create custom storage while adding character to any room. You'll need 4-6 wooden crates, wood stain or paint, sandpaper, and basic tools to get started.
Sand each crate thoroughly to prevent splinters and create a smooth surface for finishing.
- Stack crates horizontally or vertically to create different configurations based on your space.
- Secure the crates together using L-brackets and screws for stability.
- Add casters to the bottom for a mobile solution that's perfect for small spaces.
- Consider adding a backing board for extra support and a more polished look.
Before assembly, decide if you want to stain or paint your crates. You can keep them natural for a farmhouse feel or paint them in bold colors for a modern twist.
Don't forget to seal the wood to protect it from moisture and wear. Once assembled, your DIY bookshelf can hold books, display decorative items, or store everyday essentials.
Position it against a wall or use it as a room divider to maximize your space's potential.
Hidden Staircase Drawers
Looking to maximize unused space in your home? Transform your staircase into a clever storage solution by installing hidden drawers beneath each step. These pull-out compartments utilize the often-wasted space under your stairs while maintaining the original appearance of your staircase.
You'll need to measure each stair's depth and width carefully before building custom drawer boxes that fit snugly within the available space. Install heavy-duty drawer slides rated for at least 100 pounds to guarantee smooth operation and durability. Choose handles that sit flush with the riser surface to maintain a seamless look.
These hidden drawers work perfectly for storing seasonal items, shoes, books, or cleaning supplies. Consider adding moisture-resistant liners to protect stored items, especially in basement staircases.
For safety, install childproof locks if you have young children, and make certain the drawers close securely to prevent tripping hazards.
While this project requires intermediate carpentry skills and precise measurements, it's a worthwhile investment that can add up to 40 cubic feet of storage space to your home.
Remember to check local building codes and confirm your modifications won't compromise the staircase's structural integrity.
Door-Mounted Organizer Rack

Another smart way to maximize vertical storage lies right on your doors. A door-mounted organizer rack transforms unused door space into a practical storage solution that won't intrude into your room.
You'll find these organizers particularly useful in bathrooms, bedrooms, and pantries, where they can hold everything from toiletries to snacks.
Installing a door-mounted organizer is straightforward – you'll need basic tools and about 30 minutes. Choose a rack that fits your door's dimensions and guarantee it won't interfere with the door's closure.
Most models feature adjustable heights and removable baskets, letting you customize the setup for your specific needs.
- Deep wire baskets work best for storing bulky items like cleaning supplies or dry goods
- Clear plastic pockets provide visibility and easy access to smaller items
- Hook systems accommodate hanging items like robes, towels, or accessories
- Shallow shelves are perfect for spice jars or cosmetics
You can maximize your organizer's efficiency by grouping similar items together and using small containers within the baskets to prevent items from shifting when the door moves.
Label each section to maintain organization and make items easily accessible.
Stackable Cube Storage Units
You'll find stackable cube storage units to be a budget-friendly solution, with materials ranging from affordable laminate boards to premium solid wood options depending on your style and durability needs.
Building these versatile units requires basic tools and hardware, starting with the assembly of individual cubes that you can later connect using brackets or interlocking designs.
The modular nature of cube storage lets you expand vertically or horizontally as your storage needs change, making them perfect for maximizing space in any room.
Cost and Material Options
When building stackable cube storage units, you'll find materials ranging from $15 to $100 per cube depending on quality and durability. The most cost-effective option is medium-density fiberboard (MDF), which offers decent strength at around $20-30 per sheet.
If you're looking for something more durable, consider plywood or solid wood, though these will increase your budget considerably.
- Baltic birch plywood ($45-65 per sheet) provides excellent durability and a clean, professional look that's perfect for long-term storage solutions.
- Solid pine ($3-5 per linear foot) creates a rustic appearance and remains affordable while offering good strength.
- High-grade hardwoods ($8-15 per linear foot) like oak or maple deliver premium quality and stunning aesthetics.
- Melamine-coated particleboard ($30-40 per sheet) resists moisture and comes pre-finished in various colors.
Don't forget to factor in additional costs for hardware like wood glue ($5-8), screws ($8-10 per box), corner brackets ($2-4 each), and finishing materials ($15-25).
If you're working with raw wood, you'll also need sandpaper ($5-10) and your choice of stain or paint ($20-30).
Assembly Step by Step
Building stackable storage cubes requires careful attention to sequence and precision for ideal results.
Start by laying out all your pre-cut pieces and organizing your hardware. You'll need the side panels, back panel, top, bottom, and any shelf inserts you've prepared.
Begin assembly by attaching the side panels to the bottom piece using wood glue and screws. Make sure your corners are square by measuring diagonally from corner to corner.
Next, slide the back panel into the grooves you've created and secure it with finishing nails. Install any shelf support pins or tracks at your desired heights.
For the finishing touches, attach the top panel using the same method as the bottom. If you're adding doors, install the hinges now while you can easily access the interior.
Don't forget to sand any rough edges and wipe away excess glue before it dries. Finally, add any desired finish or paint, allowing proper drying time between coats.
When you're ready to stack your cubes, use connector brackets to secure them together, ensuring they won't tip or shift during use.
Test each cube's stability before adding your items.
Space-Saving Design Benefits
The ingenious design of stackable storage cubes transforms even the smallest living spaces into organized havens. You'll discover that these versatile units adapt to your changing needs, whether you're living in a compact apartment or maximizing space in a family home.
The modular nature of cube storage lets you reconfigure your setup as often as needed, making it a practical solution for both temporary and permanent storage needs.
- Create vertical storage solutions that utilize wall height instead of precious floor space
- Mix and match open cubes with door inserts to hide clutter while displaying decorative items
- Arrange units in L-shaped configurations to maximize corner spaces
- Separate spaces functionally by using the cubes as room dividers
The beauty of stackable storage lies in its flexibility – you can start small and expand your storage system over time.
When you're ready to move or redecorate, these lightweight units can be easily disassembled and reconstructed in new configurations.
Frequently Asked Questions
How Much Money Can I Save by Making DIY Storage Versus Buying Retail?
You'll typically save 40-70% by making DIY storage solutions instead of buying retail. A $100 store-bought cabinet could cost you just $30-60 in materials when you build it yourself.
Which Power Tools Are Essential for Beginners Starting Storage DIY Projects?
You'll need four basic power tools to start: a cordless drill/driver, circular saw, jigsaw, and sander. These essentials help you cut, join, and finish wood pieces for most storage projects effectively.
What Permits Might I Need for Installing Built-In Storage Solutions?
You'll typically need building permits for structural changes like built-in closets or wall modifications. Contact your local building department first, as requirements vary by location and project scope – especially for load-bearing walls.
Are There Child-Safety Considerations When Designing Home Storage Projects?
You'll need to secure heavy furniture, install childproof locks, avoid pinch points, and keep dangerous items out of reach. Mount storage units to walls and guarantee shelves can't tip over when climbed.
How Do I Calculate Weight Capacity for Wall-Mounted Storage Solutions?
You'll need to locate wall studs and consider your mounting hardware's rating. Multiply the number of studs by the screws' capacity, then subtract 20% for safety. Always check manufacturer specifications for brackets.
In Summary
You'll find these DIY storage solutions transform cluttered spaces into organized havens while relieving daily stress. Whether you're maximizing under-bed space or creating stylish floating shelves, these projects help you take control of your environment. Start with one project that addresses your biggest organizational pain point, and you'll soon discover how a well-ordered home leads to a calmer, more peaceful mindset.


Leave a Reply