
Organize your baking space with these seven stress-free tips. Start by streamlining your tools, grouping similar items together. Create dedicated zones for ingredients, using clear containers and labels. Implement a labeling system for easy identification and expiration tracking. Go digital with your recipes, using apps for easy access and searching. Declutter countertops and cabinets, keeping only essential items within reach. Maximize vertical storage with hanging racks and tiered shelves. Finally, establish a regular cleaning routine to maintain order. By following these strategies, you'll transform your kitchen into an efficient baking haven. Discover how these tips can revolutionize your baking experience.
Streamline Your Baking Tools
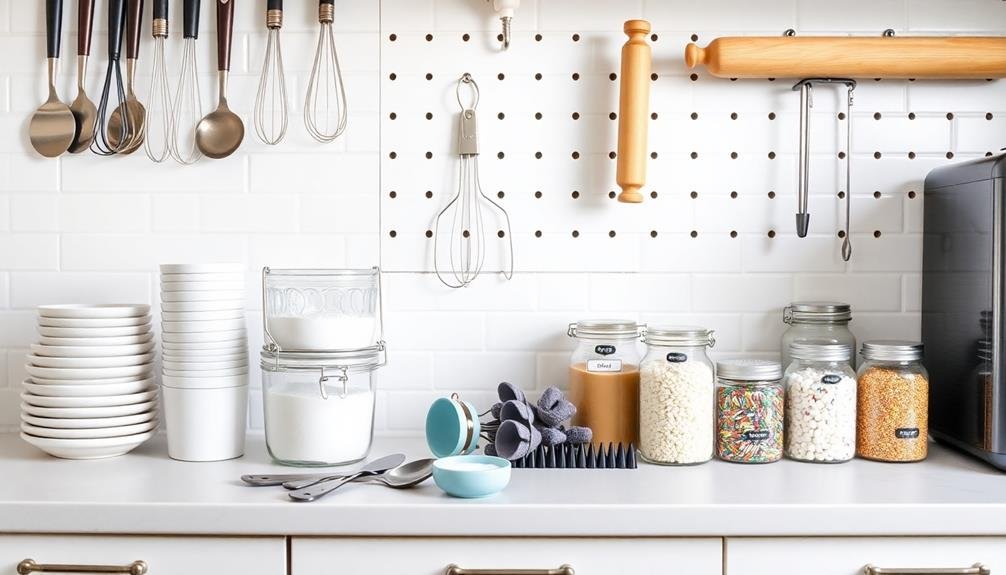
A well-organized kitchen is a baker's best friend. To streamline your baking tools, start by taking inventory of what you have and getting rid of duplicates or items you rarely use.
Group similar tools together, such as measuring cups, spoons, and scales in one area, and mixing bowls and utensils in another.
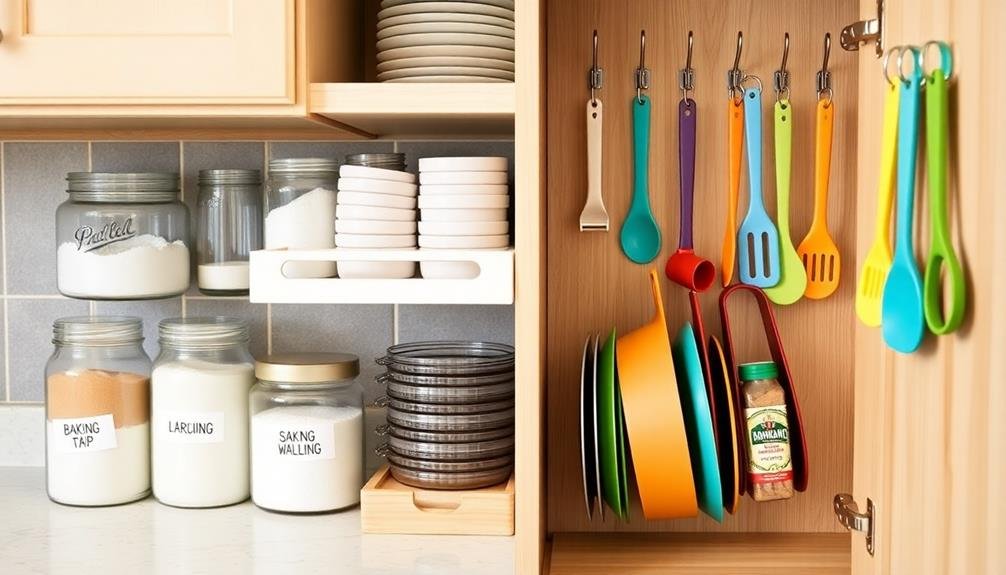
Invest in clear, stackable containers for dry ingredients like flour, sugar, and baking powder. Label them clearly and store them at eye level for easy access.
Use drawer dividers or utensil holders to keep spatulas, whisks, and wooden spoons tidy and within reach.
Consider hanging frequently used items like measuring cups and spoons on hooks or a pegboard to save drawer space.
For baking sheets and cooling racks, use vertical organizers or file holders to store them upright.
Don't forget about your small appliances. Keep your stand mixer, food processor, and hand mixer in easily accessible spots if you use them often.
If space is limited, store less frequently used appliances in cabinets or on high shelves.
Lastly, create a designated area for your recipe books or a tablet to reference digital recipes while baking.
Create Dedicated Ingredient Zones
Creating dedicated ingredient zones can revolutionize your baking process. Start by grouping similar ingredients together in easily accessible areas. Designate a shelf or cabinet for flours, sugars, and other dry goods. Use airtight containers to keep these ingredients fresh and protect them from pests. Label each container clearly to avoid confusion and streamline your recipe preparation.
For refrigerated items like eggs, butter, and cream, allocate a specific area in your fridge. This will help you quickly assess what you have on hand and what needs restocking. Consider using clear bins or organizers to keep these items tidy and visible.
Don't forget about your spices and extracts. Install a spice rack or drawer insert to keep these flavor enhancers organized and within reach. Group them alphabetically or by frequency of use for easy access.
For frequently used items like baking powder, baking soda, and salt, create a small station near your mixing area. This will save you time and steps when you're in the middle of a recipe.
Implement a Labeling System
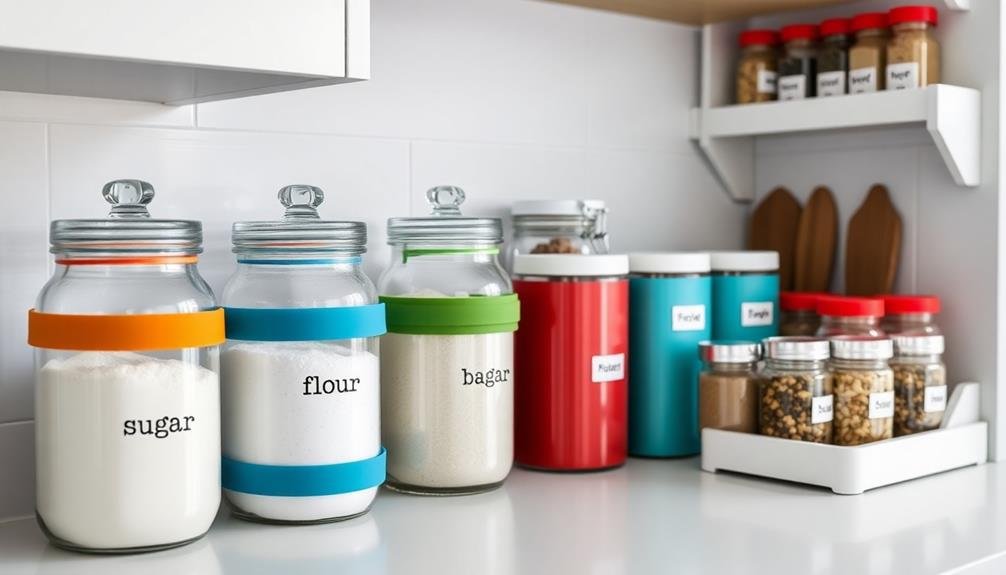
Implementing a labeling system in your kitchen can lead to a more efficient and organized baking experience. Start by investing in a label maker or using waterproof labels and a permanent marker. Label all your storage containers, including those for flour, sugar, and other dry ingredients.
Don't forget to include the expiration date on perishable items.
Create a color-coding system for different categories of ingredients. For example, use green labels for herbs and spices, blue for baking powders and soda, and yellow for sweeteners. This visual system will help you quickly locate items when you're in the middle of a recipe.
Label your shelves and drawers to designate specific areas for different baking tools and equipment. This will guarantee everything has a proper place and makes it easier for you to maintain order in your kitchen.
Consider using chalkboard labels on larger storage bins or pantry areas. These allow you to easily update contents as needed.
For frequently used recipes, create labels with ingredient lists and measurements, attaching them to the inside of cabinet doors for quick reference.
Organize Recipes Digitally
Digital recipe organization revolutionizes how bakers manage their culinary creations. By embracing digital tools, you'll streamline your baking process and keep your recipes easily accessible.
Start by choosing a reliable recipe management app or software that suits your needs. These platforms allow you to input, categorize, and search for recipes effortlessly.
Once you've selected your digital tool, begin transferring your physical recipes into the system. Scan handwritten notes, photograph recipe cards, or manually type in your favorite recipes. Tag each entry with relevant keywords like "desserts," "gluten-free," or "quick breads" to make searching a breeze.
Many apps also offer features like scaling ingredients, meal planning, and grocery list generation.
Cloud-based storage guarantees your recipes are safe and accessible from any device. You can easily share recipes with friends or family, and access them while shopping for ingredients.
Some apps even allow you to add notes or modifications to recipes, helping you refine your baking techniques over time. By organizing your recipes digitally, you'll save space in your kitchen, reduce clutter, and have your entire recipe collection at your fingertips whenever inspiration strikes.
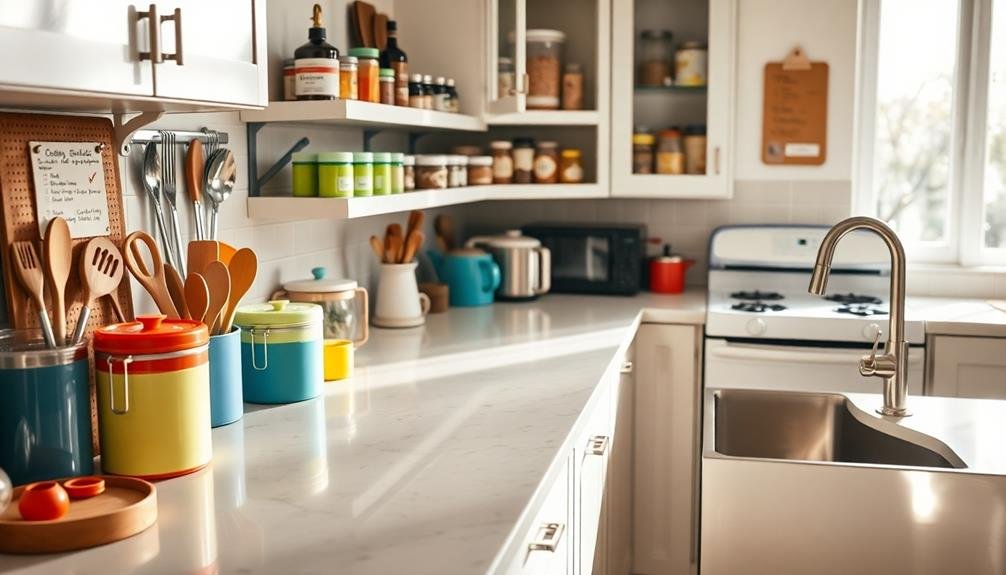
Declutter Countertops and Cabinets
Start your kitchen decluttering journey by removing unused tools and appliances from your countertops and cabinets.
You'll free up valuable space and make your baking area more efficient by keeping only the items you regularly use.
Organize your remaining tools based on how frequently you use them, placing everyday items within easy reach and storing less-used equipment in harder-to-access areas.
Remove Unused Kitchen Tools
Over time, kitchens tend to accumulate gadgets and tools that rarely see use. As a baker, it's crucial to streamline your workspace by removing these unused items.
Start by emptying your drawers and cabinets, then sort through each item. Ask yourself when you last used it and if it serves a specific purpose in your baking routine.
Be ruthless in your decision-making. If you haven't used a tool in the past year, it's probably time to let it go. Consider donating or selling specialty items that you thought you'd use but never did. Keep only the essentials that support your baking style and frequency.
Don't forget to assess your small appliances too. That bread maker or waffle iron might be taking up valuable counter space if you're not using it regularly.
For seasonal items like cookie cutters or specialty pans, consider storing them in labeled boxes outside the kitchen.
Organize by Frequency Use
Once you've cleared out unused items, it's time to strategically organize what remains. The key is to arrange your baking tools and ingredients based on how often you use them. This approach will save you time and reduce frustration when you're in the middle of a baking project.
Start by identifying your most frequently used items. These might include measuring cups, mixing bowls, and your stand mixer. Place these within easy reach on your countertop or in easily accessible cabinets.
For items you use weekly, like cake pans or cookie sheets, designate a specific shelf or drawer that's still relatively convenient. Less frequently used items, such as specialty baking molds or seasonal cookie cutters, can be stored in higher cabinets or deeper drawers.
Don't forget about vertical space – install hooks or racks on walls or inside cabinet doors to hang utensils, measuring spoons, or even small pans.
Consider using clear storage containers for dry ingredients and label them clearly. Group similar items together, like extracts near spices, or decorating tools in one container.
This system will help you quickly locate what you need and maintain an organized kitchen, making your baking experiences more enjoyable and efficient.
Maximize Vertical Storage Space
To make the most of your kitchen's vertical space, you'll want to explore overhead hanging racks for pots, pans, and utensils.
Installing tiered shelving units can dramatically increase your storage capacity, especially for baking sheets and cooling racks.
Don't forget to stack containers efficiently, using risers or organizers to maximize every inch of cabinet space.
Utilize Overhead Hanging Racks
Making the most of your kitchen's vertical space is essential for bakers with limited storage. Overhead hanging racks offer an excellent solution for organizing your baking tools and equipment. You'll free up valuable counter and cabinet space while keeping frequently used items within easy reach.
Install sturdy ceiling-mounted racks or hanging pot rails to maximize your kitchen's overhead area. These versatile storage options can accommodate a wide range of baking essentials, from pots and pans to utensils and small appliances. Choose racks with adjustable hooks or S-hooks to customize your setup and easily rearrange items as needed.
Here's a guide to help you organize your overhead hanging racks effectively:
| Item Type | Hanging Method | Benefits |
|---|---|---|
| Pots & Pans | S-hooks | Easy access, saves cabinet space |
| Utensils | Hanging caddies | Keeps tools organized and visible |
| Cutting Boards | Vertical slots | Prevents warping, saves drawer space |
| Measuring Cups | Magnetic strips | Quick access, reduces clutter |
When arranging your overhead racks, group similar items together and place frequently used tools within arm's reach. This system will streamline your baking process and keep your kitchen organized and efficient.
Install Tiered Shelving Units
Tiered shelving units are a baker's secret weapon for maximizing vertical storage space. They allow you to stack items in a way that's both organized and easily accessible.
When installing these units, consider placing them near your baking station for convenience. You'll be amazed at how much more efficient your kitchen becomes when everything's within arm's reach.
Choose shelving units that fit your specific needs. Look for adjustable shelves to accommodate items of various sizes, from small spice jars to large mixing bowls.
Opt for sturdy materials that can withstand the weight of heavy appliances and cookware. Don't forget to measure your space carefully before purchasing to guarantee a perfect fit.
To make the most of your tiered shelving units:
- Group similar items together for easy locating
- Use clear containers to store dry ingredients
- Label everything clearly to avoid confusion
- Rotate items regularly, keeping frequently used ones at eye level
Stack Containers Efficiently
Building on the concept of vertical storage, stacking containers efficiently is another powerful way to maximize your kitchen space. Start by investing in a set of nesting containers with airtight lids. These allow you to store various dry ingredients while taking up minimal space when not in use.
Look for square or rectangular containers, as they fit together more efficiently than round ones. When stacking, place heavier items at the bottom and lighter ones on top. Use clear containers to easily identify contents without unstacking. Label each container with the ingredient name and expiration date to streamline your baking process.
Consider purchasing stackable measuring cups and spoons to save drawer space. For larger items like mixing bowls and cake pans, use vertical organizers or pan racks to keep them upright and easily accessible.
Don't forget about your fridge and freezer. Use stackable containers for storing butter, eggs, and pre-made dough. In the freezer, stack flat bags of frozen fruits or nuts for smoothies and baked goods.
Establish a Cleaning Routine
Every baker knows that a clean kitchen is essential for creating delicious treats. Establishing a cleaning routine will help you maintain a tidy workspace and reduce stress during your baking sessions.
Start by creating a daily cleaning checklist that covers basic tasks like wiping down countertops, washing dishes, and sweeping the floor. Implement a "clean as you go" policy, tackling small messes immediately to prevent them from piling up.
For a more thorough cleaning routine, consider these weekly tasks:
- Deep clean your oven and stovetop
- Sanitize your refrigerator and pantry
- Descale your coffee maker and kettle
- Wash and disinfect trash cans
Don't forget to schedule monthly deep cleans to address areas that are often overlooked, such as organizing your spice rack or cleaning out your utensil drawers.
Frequently Asked Questions
How Can I Prevent Ingredients From Going Stale in Storage?
You can prevent ingredients from going stale by storing them in airtight containers, keeping them away from heat and light, and using them within their recommended shelf life. Don't forget to label containers with expiration dates for easy tracking.
What's the Best Way to Organize Baking Pans of Different Sizes?
You'll want to nest your baking pans by size, using dividers or racks to keep them upright. Store similar shapes together, and consider hanging larger pans on wall-mounted hooks. Don't forget to label for easy identification.
How Do I Efficiently Store and Organize Decorating Tools and Supplies?
You'll want to use clear, stackable containers for your decorating tools and supplies. Group similar items together, label everything clearly, and store frequently used items within easy reach. Hanging organizers can work well for piping tips and bags.
Are There Eco-Friendly Alternatives to Plastic Containers for Ingredient Storage?
Yes, you'll find plenty of eco-friendly alternatives to plastic containers. Try glass jars, stainless steel canisters, or bamboo containers. You can also use cloth bags for dry goods and beeswax wraps instead of plastic wrap for short-term storage.
What's the Ideal Temperature and Humidity for Storing Different Baking Ingredients?
You'll want to store most dry ingredients at cool room temperature (60-70°F) with low humidity. Keep flour and sugar around 50-60% humidity. For yeast and nuts, use your fridge. Always seal containers tightly to maintain freshness.
In Summary
You've now got the tools to transform your baking space into a stress-free zone. By streamlining your tools, organizing ingredients, and maximizing storage, you'll find baking more enjoyable than ever. Don't forget to keep your recipes digital and your countertops clutter-free. With a solid cleaning routine in place, you'll maintain this new order effortlessly. Embrace these tips, and you'll be whipping up delicious treats in your perfectly organized kitchen in no time!


Leave a Reply