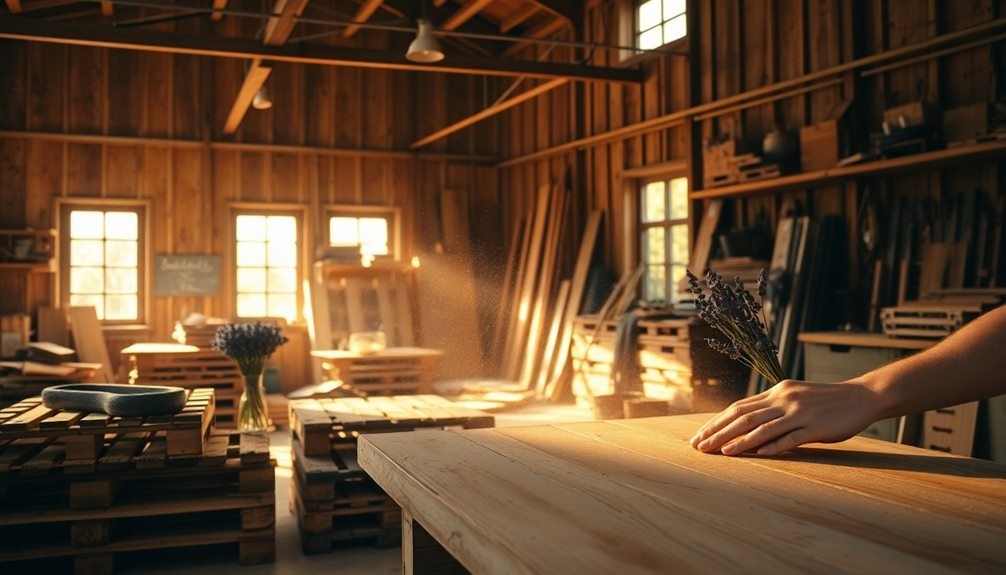
Transform reclaimed pallet wood into seven therapeutic DIY projects that'll help you unwind and create beauty for your home. You can craft a simple garden planter for growing herbs, design a rustic wall art display for personal photos, or build a meditation bench for quiet reflection. Get creative with soothing wind chimes, construct a bird-watching window box to connect with nature, shape mindful tea light holders for ambient lighting, or assemble cozy reading nook shelves for your favorite spaces. Each project offers a chance to practice mindfulness while working with your hands, and there's so much more to discover about these calming crafts.
Simple Pallet Garden Planter
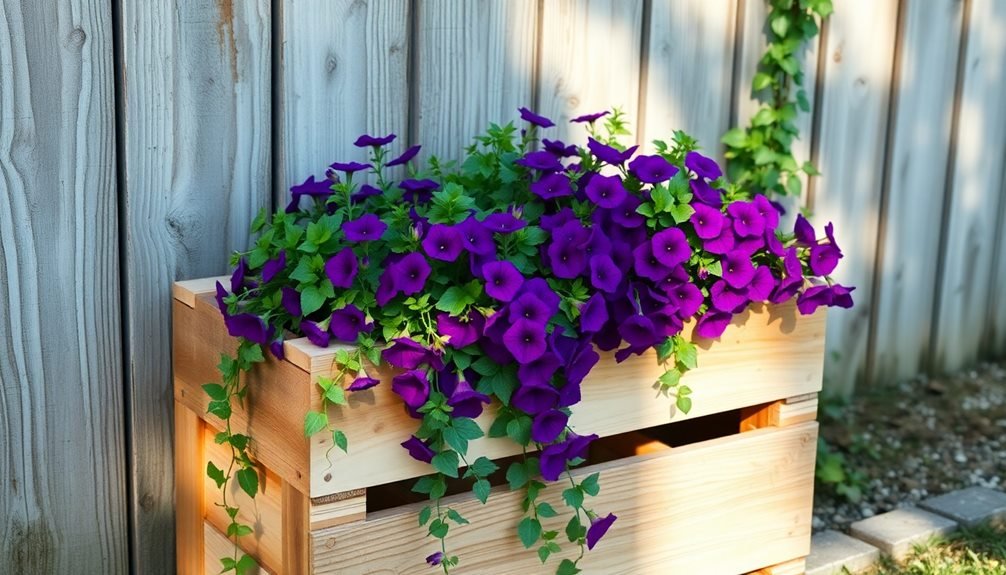
While many DIY projects require complex tools and skills, creating a pallet garden planter couldn't be simpler. You'll need just one wooden pallet, sandpaper, wood sealer, potting soil, and your chosen plants.
Start by thoroughly sanding the pallet to remove splinters and rough spots, paying special attention to edges where your hands will touch.
Apply two coats of wood sealer to protect your planter from moisture and extend its life. Once it's dry, position your pallet vertically against a wall or fence, ensuring it's stable. You can secure it with L-brackets if needed.
Line the spaces between slats with landscape fabric, creating pockets that'll hold your soil and plants.
Fill each pocket with potting soil, leaving an inch of space at the top. Now you're ready to add your plants – herbs work especially well in the upper pockets, while trailing plants like ivy or strawberries look stunning in lower sections.
Water thoroughly but carefully at first, allowing the soil to settle. You'll notice how tending to your vertical garden becomes a peaceful, mindful activity that helps reduce daily stress.
Rustic Wall Art Display
Creativity shines through a rustic wall art display made from reclaimed pallet wood. This mindful project lets you transform weathered boards into a unique gallery wall that showcases your favorite photos, artwork, or inspirational quotes.
Start by carefully dismantling a pallet and selecting boards with interesting grain patterns or natural weathering. Sand the surfaces lightly to prevent splinters while maintaining their rustic character. Cut the boards to your desired lengths, creating a mix of horizontal and vertical pieces that'll form your display's foundation.
You'll need to build a simple frame using four pallet boards arranged in a rectangle. Attach additional boards across the frame's interior, spacing them evenly or randomly to create visual interest. Add small clips, wire, or twine to hang your art pieces.
Consider incorporating LED string lights between the boards for ambient lighting, or attach mason jars to hold fresh flowers or succulents. Mount your display using heavy-duty D-rings and wall anchors.
As you work with the wood, focus on each step's rhythmic motions – sanding, measuring, and assembling – to create a meditative crafting experience.
Pallet Wood Meditation Bench

A simple meditation bench crafted from pallet wood offers both mindful construction and purposeful daily use.
You'll find that creating this bench connects you to the sustainable practice of upcycling while providing a dedicated space for your daily meditation routine. The natural imperfections in pallet wood add character to your bench, reminding you that beauty exists in simplicity.
To construct your meditation bench, you'll need to carefully dismantle pallets, selecting boards that aren't warped or damaged. The bench's basic design features a rectangular seat supported by two angled legs, creating a comfortable height of about 8 inches off the ground.
Sand each piece thoroughly to prevent splinters and create a smooth surface that's gentle on your legs.
- Choose 3-4 pallet boards for the seat, ensuring they're similar in thickness and width
- Cut two sturdy pieces at 15-degree angles for the legs, providing ideal ergonomics
- Sand every surface progressively, starting with 80-grit and finishing with 220-grit
- Seal the wood with non-toxic finish to protect against moisture while maintaining its natural look
Soothing Wind Chimes
Making soothing wind chimes out of pallet wood connects you with both artistic expression and acoustic mindfulness. You'll need several thin strips of pallet wood, some fishing line or strong twine, a drill with various bit sizes, and decorative elements like shells or beads.
Start by cutting your pallet wood into different lengths, ranging from 4 to 12 inches, to create varied tones. Sand each piece thoroughly, paying special attention to the edges. Drill holes at the top of each wooden piece, spacing them evenly. You'll want to experiment with the placement as it affects the sound quality.
Create a top piece from a circular or square section of pallet wood, drilling holes around its perimeter to attach your chimes. Thread your fishing line through each wooden piece, securing them at different heights. Add small wooden balls or beads between the strips to act as strikers.
For enhanced mindfulness, you can paint or wood-burn meaningful symbols onto each chime. As you work, focus on the texture of the wood and envision the peaceful sounds your creation will make.
Position your finished wind chimes where gentle breezes will activate their soothing tones.
Bird-Watching Window Box

You'll find peace in crafting a window box from reclaimed pallet wood, starting with mindfully sanding each plank while appreciating its unique grain patterns and weathered character.
The assembly process lets you focus on aligning cedar-lined corners and securing decorative copper brackets, creating a perfect perch for observing nature's winged visitors.
As you add finishing touches like vintage drawer pulls and weather-resistant stain, you're building more than just a bird-watching spot – you're creating a mindful connection between your indoor and outdoor spaces.
Meditative Assembly Steps
The mindful assembly of a bird-watching window box begins with gathering your reclaimed pallet pieces in a quiet workspace. As you handle each wooden plank, feel its texture and notice the unique grain patterns that tell stories of their previous life.
You'll want to select boards that are similar in thickness but varied in character for visual interest. Before cutting or joining any pieces, take time to arrange your materials mindfully. This pre-assembly meditation helps you visualize the final product while staying present in the moment.
You'll need six planks for the box's body and two for the pitched roof.
- Sand each piece deliberately, moving with the wood's grain while observing how the surface transforms under your touch.
- Apply gentle pressure when joining corners, feeling the connection points align naturally.
- Pause between each screw placement, ensuring your movements are intentional and precise.
- Test the lid's movement thoughtfully, adjusting the hinges until they swing with just the right resistance.
As you complete each step, you're not just building a window box – you're practicing mindfulness through purposeful creation.
Materials and Decorative Elements
Natural materials blend seamlessly with mindful craftsmanship in this bird-watching window box project.
You'll need four reclaimed pallet boards (18 inches long), galvanized screws, wood glue, cedar shavings for natural bird nesting material, and weather-resistant stain. Choose pallets marked with "HT" (heat-treated) to ascertain they're safe for outdoor use and wildlife contact.
For decorative elements that attract birds, incorporate copper accents through small copper caps on the corners or a thin copper strip along the roof edge.
Add natural perches using fallen branches (½ inch diameter) from your yard, and mount them horizontally beneath the feeding area. You'll want to include a small copper or ceramic water dish that's removable for cleaning.
Consider adding natural preservatives like linseed oil to protect the wood while keeping it chemical-free for your feathered visitors.
Create visual interest by weaving dried grape vines around the box's outer edges or attaching bark pieces to the sides.
Don't forget to include drainage holes (¼ inch) in the bottom corners and a hinged roof for easy cleaning and seed refilling.
Mindful Tea Light Holders
Your journey into crafting mindful tea light holders starts with selecting and smoothing small pallet wood squares, which you'll arrange in a simple, geometric pattern.
You can enhance the calming atmosphere by choosing soft, muted paint colors like sage green or warm gray, letting the natural wood grain show through.
While assembling your tea light holders, focus on each precise movement as you connect the pieces, treating the mindful building process as a form of meditation.
Simple Rustic Design Steps
Making mindful tea light holders from pallet wood transforms simple materials into charming rustic decor. As you work with reclaimed wood, you'll find that each piece tells its own story through knots, grain patterns, and natural weathering. The process of creating these holders isn't just about crafting; it's about connecting with the material and practicing mindfulness through woodworking.
You'll need to prepare your workspace with basic tools, including a saw, sandpaper, wood glue, and a drill with a hole saw attachment that matches your tea light size. Select pallet pieces that speak to you, focusing on sections that showcase interesting characteristics or weathering patterns.
- Cut your chosen pallet wood into 4×4-inch squares, ensuring clean, straight edges.
- Sand each piece thoroughly, starting with coarse-grit and progressing to fine-grit sandpaper.
- Mark the center point and drill your tea light hole about 1/2 inch deep.
- Apply a natural finish like beeswax or leave the wood raw for a more rustic appearance.
Remember to stay present during each step, paying attention to the wood's texture and the rhythmic motion of sanding. This mindful approach helps create unique pieces while reducing stress.
Calming Paint Color Options
While natural wood grain offers timeless appeal, adding mindful color choices to your tea light holders can enhance their calming presence. Select paint colors that promote relaxation and align with your meditation goals. Soft sage green connects you to nature, while lavender purple encourages peaceful contemplation. Pale blue mimics the serenity of clear skies, and warm cream tones create a gentle, nurturing atmosphere.
You'll want to use non-toxic, water-based paints that won't emit harsh fumes. Apply thin layers to maintain the wood's texture, allowing subtle grain patterns to show through. Consider using a dry brush technique to create a weathered, coastal effect that adds depth without overwhelming the piece.
For a more subdued look, try whitewashing your tea light holders with a diluted paint mixture. This technique preserves the wood's character while softening its appearance. You can also combine two complementary colors, such as seafoam green and sandy beige, to create visual interest that doesn't disturb your mindful practice.
Remember to seal your painted surfaces with a low-VOC clear coat to protect the finish while maintaining the calming aesthetic.
Mindful Assembly Techniques
Assembly of mindful tea light holders becomes a meditative practice when you approach each step with intentional focus.
As you work with reclaimed pallet wood, let each movement flow naturally while maintaining awareness of your breathing. You'll find that sanding becomes rhythmic, and measuring transforms into a grounding exercise.
Take time to feel the wood's texture beneath your fingertips as you select pieces for your project.
When you're cutting the wood to size, focus on the precision of each mark and cut rather than rushing to completion. The assembly process isn't just about creating a holder; it's about being present in each moment.
- Before joining pieces, align them mindfully and breathe deeply, ensuring they're perfectly matched.
- Apply wood glue with slow, deliberate strokes, staying aware of the connection being formed.
- When securing joints with screws, turn them steadily while focusing on the resistance and movement.
- Sand the final piece in smooth, even motions, letting the repetitive movement calm your mind.
Your finished tea light holder won't just illuminate spaces – it'll remind you of the peaceful moments spent creating it.
Cozy Reading Nook Shelves
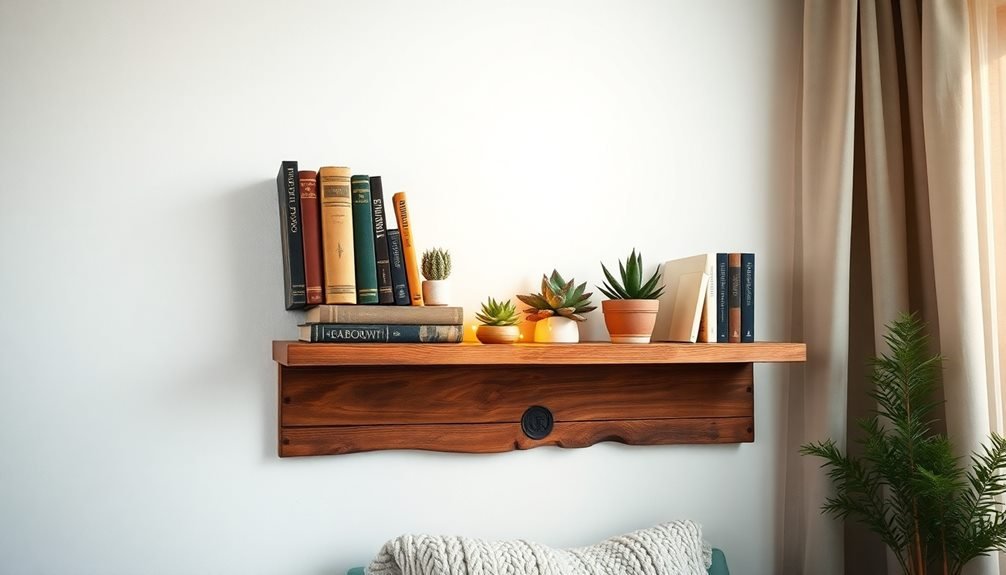
Every bookworm deserves a cozy corner to curl up with their favorite reads, and pallet wood shelves provide the perfect rustic charm for your reading nook.
Start by selecting three evenly-sized pallet boards for each shelf tier, ensuring they're free from splits or protruding nails. Sand each piece thoroughly, focusing on the edges to prevent splinters during daily use.
Cut your boards to your desired shelf length, keeping in mind the available wall space and the size of your book collection. You'll want to create L-shaped brackets from the remaining pallet wood pieces, which will support each shelf from underneath.
Space your shelves 12 inches apart vertically to accommodate various book sizes.
Before mounting, treat your wood with natural beeswax or a low-VOC sealant to protect against moisture while maintaining that mindful connection to natural materials.
Use a level and wall anchors to secure each bracket, ensuring they can support the weight of your books.
Add LED strip lighting underneath each shelf to create a warm, inviting ambiance that'll help you unwind with your favorite stories after a long day.
Frequently Asked Questions
How Long Should Pallet Wood Dry Before Starting Mindfulness Projects?
You'll need to let your pallet wood dry for 2-3 weeks in a covered, well-ventilated area. If it's fresh or wet, check moisture content with a meter until it's below 19% before starting.
What Safety Equipment Is Essential When Working With Recycled Pallets?
You'll need safety glasses, a dust mask, heavy-duty gloves, steel-toed boots, and long sleeves to protect yourself when handling pallets. Don't forget ear protection when using power tools to process the wood.
Which Tools Are Absolutely Necessary for Beginner Pallet Woodworking?
You'll need basic tools to start: a hammer, pry bar, handsaw or circular saw, drill with bits, measuring tape, pencil, safety glasses, and work gloves. These essentials help you tackle most beginner pallet projects.
Can Treated Pallets Be Safely Used for Indoor Meditation Projects?
You shouldn't use treated pallets indoors as they can release harmful chemicals. If you're creating meditation pieces, stick to untreated, heat-treated (HT) pallets that are clearly marked as chemical-free for safety.
What's the Best Way to Identify Food-Grade Pallets for Craft Projects?
You'll find food-grade pallets by looking for "HT" (heat-treated) or "EPAL" stamps. Check for IPPC certification marks, clean surfaces, and blue/white coloring. Avoid chemical stamps or stains indicating prior contamination.
In Summary
You'll find that working with pallet wood isn't just about creating functional pieces – it's a mindful practice that helps you slow down and focus on the present moment. Whether you're building a meditation bench or crafting wind chimes, each project offers a chance to reduce stress while giving new life to reclaimed materials. Start with any of these seven projects and discover how woodworking can become your path to tranquility.


Leave a Reply