Release your creativity and melt away stress with these engaging polymer clay hobby ideas. Craft miniature garden charms to add whimsy to your plants. Design colorful mandala coasters for a touch of zen. Sculpt whimsical animal figurines to bring joy to your space. Create textured wall art for a unique home accent. Make personalized jewelry pieces that reflect your style. Shape stress-relief squishies for on-the-go relaxation. Experiment with marbled home decor accessories. Craft fantasy-inspired book ends to showcase your imagination. Design customized keychains and magnets for thoughtful gifts. These versatile projects offer endless possibilities to sculpt your way to a calmer mind and a more vibrant living space.
Miniature Garden Charms

With polymer clay, you can create enchanting miniature garden charms that bring a touch of whimsy to any space. These tiny treasures are perfect for adding a magical element to potted plants, terrariums, or fairy gardens.
Start by crafting miniature vegetables like carrots, tomatoes, and pumpkins using vibrant colors. Roll out small balls for flower heads and attach them to thin coils for stems. Don't forget to add texture with tools or household items like toothpicks.
Create charming garden accessories such as watering cans, wheelbarrows, and garden gnomes to complete your miniature scene. Use metallic clay or paint to give objects a realistic sheen. For added detail, incorporate small beads or wire for handles and accents.
Once you've finished sculpting, bake your creations according to the clay manufacturer's instructions. After cooling, you can attach your charms to jump rings or headpins to create pendants, earrings, or decorative elements.
These miniature garden charms make delightful gifts for plant lovers or can be used to personalize your own green spaces. Let your imagination run wild as you bring these tiny garden worlds to life with polymer clay.
Colorful Mandala Coasters
In spite of their intricate appearance, colorful mandala coasters are surprisingly easy to create with polymer clay. You'll need various colors of clay, a rolling pin, and basic sculpting tools.
Start by rolling out a base color into a circular shape for your coaster. Then, create thin ropes of different colored clay to form the mandala pattern.
Begin at the center of your coaster, layering concentric circles of clay ropes outward. Use a needle tool to gently press the ropes into the base, ensuring they adhere well. As you work outward, incorporate more intricate designs by twisting ropes together or adding small clay shapes like dots or leaves.
Don't worry about perfection; the beauty of mandalas lies in their organic, handmade quality. Once you're satisfied with your design, bake the coaster according to the clay manufacturer's instructions.
After cooling, you can add a glossy finish with polymer clay varnish for extra durability.
These coasters make excellent gifts or unique home decor items. You can create sets with complementary color schemes or experiment with different mandala patterns for each coaster.
Whimsical Animal Figurines

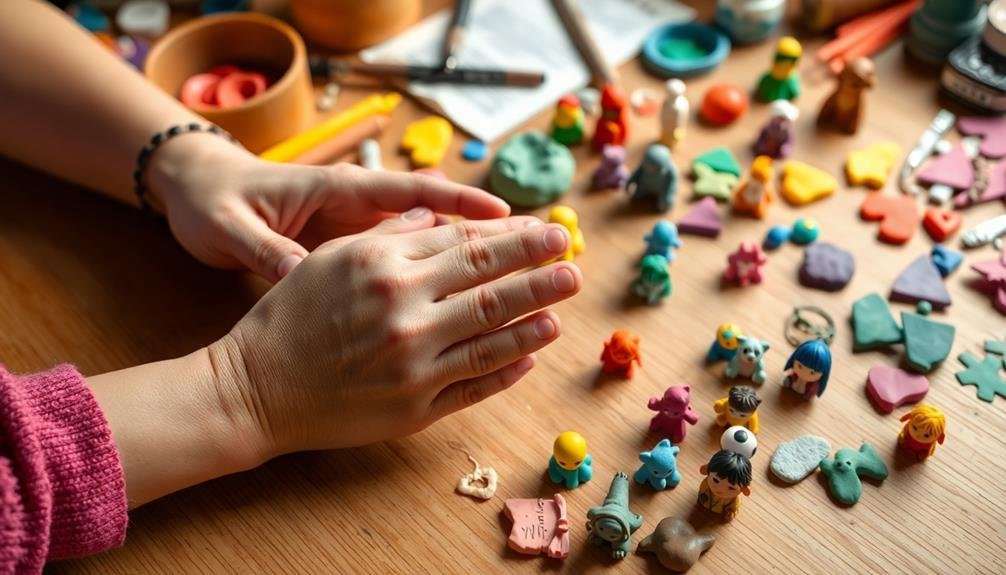
You'll love creating whimsical animal figurines with polymer clay, bringing your imagination to life in miniature form.
Start by mastering basic shapes and blending techniques to craft adorable creatures with unique personalities.
As you refine your skills, you'll add intricate details and textures to make your tiny animal sculptures truly come alive.
Cute Miniature Creature Designs
Imagination runs wild when creating cute miniature creature designs with polymer clay. You'll find endless possibilities for crafting adorable, pint-sized beings that charm and delight.
Start by sketching your ideas, focusing on exaggerated features that enhance cuteness, like big eyes, tiny noses, and chubby bodies.
Choose vibrant clay colors to bring your creatures to life. Mix shades to create unique hues that'll make your miniatures stand out. Roll small balls for the body and head, then add details like ears, tails, and limbs. Use tools to create texture, such as fur or scales, depending on your creature's design.
Don't forget to give your miniatures personality through facial expressions. Add tiny smiles, surprised looks, or sleepy eyes to make them more endearing. You can also create accessories like hats, bows, or miniature props to enhance their charm.
Once you've perfected your technique, consider making sets of creatures or even creating a fantastical world for them to inhabit. These cute miniatures make great gifts, desk ornaments, or collectibles.
You'll soon find yourself addicted to crafting these irresistible tiny beings.
Character-Building Techniques
When crafting whimsical animal figurines, character-building techniques are essential for bringing your creations to life. Start by sketching your character's basic shape and proportions. This will help you visualize the final product and plan your clay usage.
Next, focus on creating a solid armature using wire or aluminum foil to support your figure and maintain its pose. Begin building your character's body with polymer clay, adding layers gradually to achieve the desired shape. Pay attention to anatomical details like muscle definition and bone structure, even if you're creating a stylized version.
For facial features, use small tools to carve and shape eyes, nose, and mouth. Don't forget to add texture for fur, scales, or feathers using various sculpting tools or household items. Incorporate unique traits that give your character personality, such as oversized ears, a crooked smile, or a quirky stance.
Consider adding accessories like hats, glasses, or props to enhance your figurine's charm. Finally, blend colors and create patterns to bring your whimsical animal to life. With practice, you'll develop your own signature style in character building.
Finishing Touches and Details
Once you've shaped your whimsical animal figurine, it's time to focus on the finishing touches that'll truly bring your creation to life. Start by adding texture to your animal's fur or skin using various tools like toothpicks, combs, or texture sheets. Next, craft tiny accessories like hats, scarves, or glasses to give your figurine personality.
For the eyes, you've got several options:
| Eye Type | Technique | Effect |
|---|---|---|
| Painted | Acrylic paint | Flat, cartoon-like |
| Glass | Embed small beads | Realistic, shiny |
| Clay | Sculpt and paint | Customizable |
| Mixed | Combine techniques | Unique, eye-catching |
Don't forget to add small details like whiskers, claws, or scales. Use a needle tool to create fine lines or patterns. For a glossy finish, apply a thin layer of liquid polymer clay before baking. After curing, you can enhance your figurine with metallic powders, mica powders, or acrylic paints to add depth and dimension. Finally, seal your creation with a clear varnish to protect it and give it a professional look.
Textured Wall Art
With its versatility and endless possibilities, polymer clay is perfect for creating stunning textured wall art. You can craft unique pieces that add depth and interest to any room.
Start by sketching your design on paper, considering the overall shape and textures you'd like to incorporate. Roll out your clay to a uniform thickness, then use various tools to create textures. Try pressing found objects like leaves, lace, or textured rollers into the clay for intricate patterns.
For a more abstract approach, experiment with layering different colors and textures of clay. Cut out shapes, blend colors, and stack elements to create a visually appealing composition.
Don't forget to add dimension by varying the thickness of your clay pieces. Once you're satisfied with your design, bake the clay according to the manufacturer's instructions.
After cooling, you can enhance your wall art with paint, mica powders, or glazes to add shine and depth. Consider mounting your finished piece on a painted canvas or wooden board for a polished look.
With polymer clay, you'll create one-of-a-kind textured wall art that's sure to become a conversation piece in your home.
Personalized Jewelry Pieces
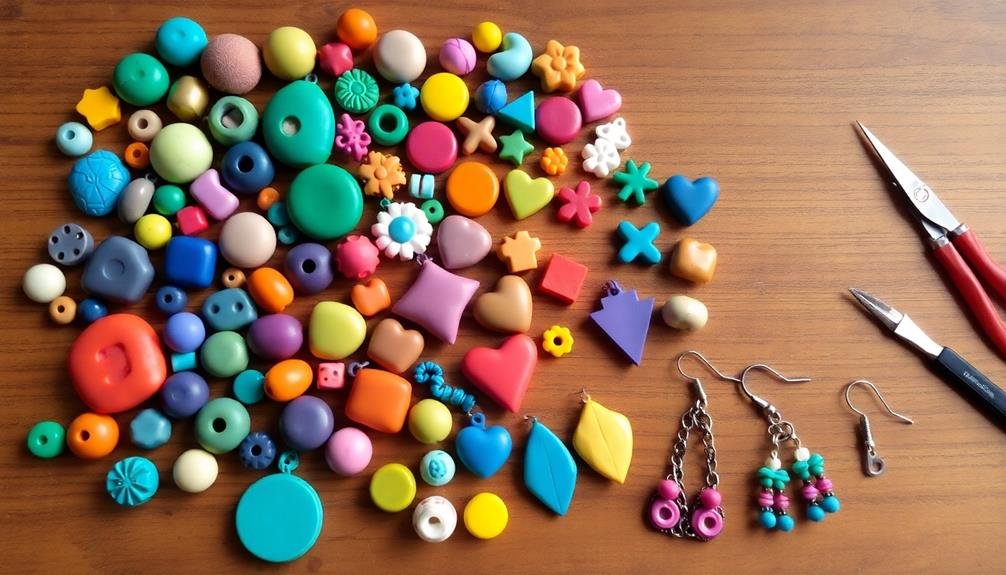
A glistening pendant or a unique pair of earrings can elevate any outfit, and crafting personalized jewelry pieces with polymer clay allows you to express your creativity while wearing your art.
Start by choosing your favorite colors and patterns, then blend them to create marbled effects or gradient shifts. Roll out thin sheets of clay and use cookie cutters or custom shapes to form the base of your jewelry.
For pendants, add texture with stamps, lace, or natural elements like leaves. Create dimension by layering different shapes or embedding small objects like beads or charms. Don't forget to make a hole for threading before baking.
For earrings, experiment with geometric shapes, miniature sculptures, or abstract designs. You can even replicate your favorite foods or animals in miniature form.
After baking, sand your pieces for a smooth finish and add a glossy coating for extra shine. Attach findings like earring hooks or necklace chains to complete your personalized jewelry.
You'll love wearing your unique creations and sharing them with friends and family as thoughtful, handmade gifts.
Decorative Succulent Planters
Moving from adorning yourself to embellishing your living space, polymer clay offers endless possibilities for creating decorative succulent planters. You can craft unique containers that complement your home decor while providing a charming home for your miniature plants.
Start by designing small, shallow bowls or pots with drainage holes to guarantee proper water flow for your succulents.
Experiment with various textures and patterns by pressing objects like lace, leaves, or textured rollers into the clay. You can also add three-dimensional elements such as petals, geometric shapes, or miniature figurines to create eye-catching designs.
Consider using metallic clay or adding gold leaf accents for a touch of elegance.
Don't forget to incorporate practical features like built-in saucers or stackable planters for space-saving arrangements. You can even create hanging planters with polymer clay by fashioning hooks or loops into the design.
Mix and match colors to create ombre effects or marbled patterns that will make your planters stand out.
Once you've perfected your creations, seal them with a waterproof varnish to protect against moisture and guarantee longevity. Your handmade succulent planters will become conversation pieces and add a personal touch to your indoor garden.
Stress-Relief Squishies

You can create your own stress-relief squishies using polymer clay, tailoring them to your preferred shapes and textures.
These customizable stress-relief tools allow you to design anything from simple spheres to intricate figures that fit comfortably in your hand.
As you knead, squeeze, and manipulate your handmade squishy, you'll engage in therapeutic squishing techniques that can help alleviate tension and promote relaxation.
Customizable Stress-Relief Shapes
For those seeking a tactile and personalized approach to stress relief, customizable polymer clay stress-relief shapes offer a unique solution. You can create your own stress-relief objects tailored to your specific needs and preferences.
Start by brainstorming shapes that you find soothing or comforting, then mold them using polymer clay.
Consider crafting:
- Smooth pebbles or river rocks
- Intricate mandalas
- Miniature animals or pets
- Abstract geometric forms
- Textured surfaces with patterns
Once you've shaped your stress-relief object, bake it according to the clay's instructions. After cooling, you'll have a durable, personalized tool to help manage anxiety and tension.
Keep your creations in easily accessible places like your desk, nightstand, or pocket.
You can experiment with different clay colors and textures to enhance the sensory experience. Some people find that adding scents to their clay creations, such as essential oils, provides an additional layer of relaxation.
Don't hesitate to make multiple shapes and sizes to suit various moods and situations. With practice, you'll develop a collection of customized stress-relief tools that work best for you.
Therapeutic Squishing Techniques
Beyond customizable shapes, polymer clay offers opportunities for creating stress-relief squishies with therapeutic squishing techniques. You can craft small, pliable objects designed to be squeezed and manipulated, providing a tactile outlet for stress and anxiety.
Start by selecting a soft, flexible polymer clay blend that maintains its shape but yields to pressure. Create simple forms like spheres, cubes, or abstract shapes that fit comfortably in your hand. Experiment with textures by pressing patterns into the surface or embedding small beads for added sensory stimulation.
You can also incorporate scents by mixing essential oils into the clay before baking. To enhance the therapeutic effect, focus on mindful squishing techniques. Practice deep breathing while slowly compressing the squishy, synchronizing your breath with the clay's movement.
Alternatively, use rapid squeezing motions to release pent-up tension quickly. For a more meditative approach, gently roll the squishy between your palms, concentrating on the sensation and letting go of intrusive thoughts.
Customize your squishies with calming colors or inspiring words molded into the surface. By combining creative expression with stress-relief techniques, you'll craft a personalized tool for managing daily pressures.
Marbled Home Decor Accessories
Swirls of color dance across polymer clay surfaces, transforming ordinary home decor into eye-catching masterpieces. You'll love creating marbled accessories that add a unique touch to your living space.
Start with simple items like coasters, drawer pulls, or vases. Mix different clay colors to achieve stunning marble effects, then shape and bake your creations.
To create marbled patterns, try these techniques:
- Roll clay into snakes and twist them together
- Layer different colors and cut through them
- Use a pasta machine to blend colors
- Create a bullseye cane and slice it thinly
- Knead contrasting colors partially for a swirled effect
Once you've mastered basic marbling, experiment with more complex home decor pieces. Try crafting picture frames, light switch covers, or even small decorative bowls.
Don't forget to seal your finished items for added durability. With practice, you'll develop your own signature marbling style, making each piece truly one-of-a-kind.
Your friends will be amazed at your handmade, professional-looking home accessories, and you'll enjoy the satisfaction of surrounding yourself with your own artistic creations.
Fantasy-Inspired Book Ends

Transport your bookshelf into a domain of fantasy with enchanting polymer clay book ends.
You can craft a magical forest scene, complete with miniature trees, mythical creatures, and twinkling fairy lights.
Alternatively, you'll impress fellow book lovers with dragon-guarded castle towers, featuring intricate details like scaled beasts perched atop stone battlements.
Magical Forest Scene
Frequently, bookworms dream of escaping into fantastical territories. With polymer clay, you can bring those magical realms to life in a stunning forest scene. Create a miniature woodland wonderland filled with whimsical elements that'll transport you to another world.
Start by crafting a base from clay, molding it to resemble forest floor textures. Add trees with intricate bark patterns and vibrant leaves. Don't forget to include magical creatures like fairies, unicorns, or woodland animals. Enhance the scene with tiny mushrooms, glowing fireflies, and sparkling crystals.
To make your magical forest truly enchanting, consider incorporating these elements:
- A babbling brook with translucent blue clay
- A fairy circle made of tiny toadstools
- A miniature treehouse nestled in the branches
- Glow-in-the-dark elements for a nighttime effect
- Hidden magical symbols or runes
As you sculpt each detail, you'll find yourself immersed in the creative process. This project allows you to explore your imagination while developing your polymer clay skills.
Once complete, display your magical forest scene proudly, letting it serve as a reminder of the fantastical worlds waiting to be discovered.
Dragon-Guarded Castle Towers
Release your inner fantasy enthusiast with dragon-guarded castle tower bookends made from polymer clay. These eye-catching creations will add a touch of magic to your bookshelf while keeping your favorite novels upright.
Start by crafting two cylindrical towers using gray or stone-colored clay. Add texture by pressing small stones or a textured rolling pin against the surface. Create miniature windows, wooden doors, and stone detailing to bring your castles to life.
Next, sculpt fearsome dragons to guard each tower. Use various shades of clay to form scales, wings, and intimidating expressions. Position the dragons as if they're wrapped around or perched atop the towers.
For added realism, incorporate landscaping elements like grass, rocks, or small trees around the base of each tower. Consider adding tiny flags or banners to the towers' peaks for a regal touch.
Once you're satisfied with your design, bake the clay according to the manufacturer's instructions. After cooling, apply a clear sealant to protect your creation and enhance its durability.
Your fantasy-inspired bookends won't only organize your library but also serve as conversation starters for fellow book lovers and fantasy enthusiasts.
Customized Keychains and Magnets
Customized keychains and magnets offer a fantastic way to showcase your polymer clay skills while creating practical, everyday items. You'll find these small-scale projects perfect for honing your techniques and experimenting with different designs.
Start by brainstorming themes or characters that resonate with you or your intended recipients. For keychains, create miniature sculptures or flatten clay into interesting shapes before attaching a metal ring. Magnets can be crafted by embedding small magnetic discs into your clay creations before baking.
Consider making:
- Colorful geometric shapes
- Tiny food replicas
- Personalized initials or monograms
- Beloved cartoon characters
- Nature-inspired designs like leaves or flowers
Don't forget to use texture tools, metallic powders, or glitter to add depth and interest to your creations. You can also incorporate mixed media elements like beads or wire for added flair.
As you become more comfortable with the process, try combining multiple techniques in a single piece. These customized items make great gifts or can be sold at craft fairs, giving you the opportunity to share your artistic vision with others while potentially turning your hobby into a small business venture.
Frequently Asked Questions
How Long Does Polymer Clay Take to Cure?
You'll find that polymer clay curing times vary. Most brands require baking at 275°F for about 15-30 minutes per 1/4 inch thickness. However, you should always check the package instructions for specific timing and temperature recommendations.
Can Polymer Clay Be Mixed With Other Materials?
Yes, you can mix polymer clay with various materials. You'll find it blends well with mica powders, glitter, and metal leaf for added sparkle. It's also compatible with certain paints and can be combined with other clay types.
What Tools Are Essential for Beginners Working With Polymer Clay?
You'll need basic tools to start: a rolling pin, cutting blade, sculpting tools, and work surface. Don't forget an oven for baking. A pasta machine's helpful for conditioning clay. Remember to get clay in colors you'll use often.
Is Polymer Clay Safe for Children to Use?
You'll find polymer clay generally safe for children when used correctly. It's non-toxic, but you shouldn't bake it in food-prep areas. Always supervise kids, guarantee proper ventilation, and follow manufacturer's guidelines for the best experience.
How Do You Store Unused Polymer Clay to Keep It Fresh?
To keep your unused polymer clay fresh, you'll want to store it in an airtight container or plastic bag. Keep it away from direct sunlight and heat sources. Don't let it touch other clay colors. It'll stay pliable for months.
In Summary
You've now got a treasure trove of polymer clay ideas to explore. Whether you're crafting tiny garden charms or marbled home decor, you'll find yourself lost in the creative process, melting away stress with each squeeze and shape. Don't be afraid to experiment and make these projects your own. Remember, it's not about perfection but the joy of creating. So grab your clay and start sculpting your way to relaxation today!

Leave a Reply