Transform your living space into a serene sanctuary with these 10 DIY wall hangings. You'll love creating a natural fiber woven tapestry with earthy textures, or crafting a delicate pressed flower collection in vintage frames. Try your hand at driftwood wind chimes for coastal charm, or design an intricate macramé dream catcher. Float botanicals between glass panels, paint peaceful ocean waves, or make a mandala on wood slices. Hang dried lavender bundles for calming aromatherapy, or arrange paper butterflies in an artistic display. A world of peaceful DIY possibilities awaits to help you craft your perfect zen space.
Natural Fiber Woven Tapestry

Natural fiber woven tapestries frequently transform plain walls into stunning focal points with their rich textures and organic appeal. By combining materials like jute, cotton, wool, and hemp, you'll create depth and visual interest that draws the eye while maintaining an earthy aesthetic.
To begin your tapestry, you'll need a wooden dowel or branch for mounting, various natural fibers of your choice, and basic weaving tools like a large-eye needle and comb. Start by securing your warp threads vertically on the dowel, spacing them evenly about 1/2 inch apart.
Then, weave your weft threads horizontally, alternating between over-under patterns and experimenting with different techniques like soumak or rya knots. You can incorporate unique elements like feathers, dried flowers, or wooden beads for added dimension.
Try varying the thickness of your fibers and leaving some areas looser than others to create organic shapes and movement. When you're finished weaving, trim any loose ends and secure them with small knots.
Add a second dowel at the bottom for weight and proper hanging, then display your piece using natural twine or leather cord.
Pressed Flower Frame Collection
Delicately preserved flowers arranged in vintage frames create an enchanting gallery wall that celebrates nature's ephemeral beauty. You'll find that pressing flowers is a meditative process that transforms fresh blooms into lasting artwork for your walls.
Select flowers at their peak, arrange them between sheets of parchment paper, and press them in heavy books for 2-3 weeks until they're completely dry.
- Choose flowers with naturally flat faces like pansies, daisies, and Queen Anne's lace
- Mix different sizes and colors to create dynamic compositions within each frame
- Press foliage like ferns and small leaves to add texture and visual interest
- Search thrift stores for vintage frames with character and patina
- Layer pressed specimens on acid-free paper to prevent deterioration
When you're ready to create your display, lay out your frames on the floor first to experiment with arrangement possibilities.
Group frames in odd numbers and vary their sizes for visual impact. Consider painting all frames the same color to unify your collection, or keep their original finishes for an eclectic look.
Mount your frames about 2-3 inches apart to create a cohesive gallery wall that brings the outside in.
Driftwood Wind Chimes

Along the shoreline, driftwood pieces weathered by waves and wind provide perfect materials for creating melodic wind chimes that'll bring coastal charm to your outdoor space.
You'll need to gather 4-5 pieces of driftwood varying in length from 8-24 inches, plus some sturdy twine, small bells, shells, and basic tools.
Start by laying out your driftwood pieces in descending order. Drill small holes about 1/2 inch from each end of the pieces. Thread your twine through the top piece, which will serve as your horizontal anchor, and secure it with strong knots.
Hang the remaining pieces vertically, spacing them 2-3 inches apart. Attach bells and shells to the bottom of each vertical piece using shorter lengths of twine. You'll want to vary the lengths slightly to create different tones when the wind catches them.
Seal your driftwood with marine-grade varnish to protect it from the elements and maintain its natural beauty. Hang your finished chime from a sturdy hook or branch where it'll catch the breeze and create gentle, seaside-inspired music.
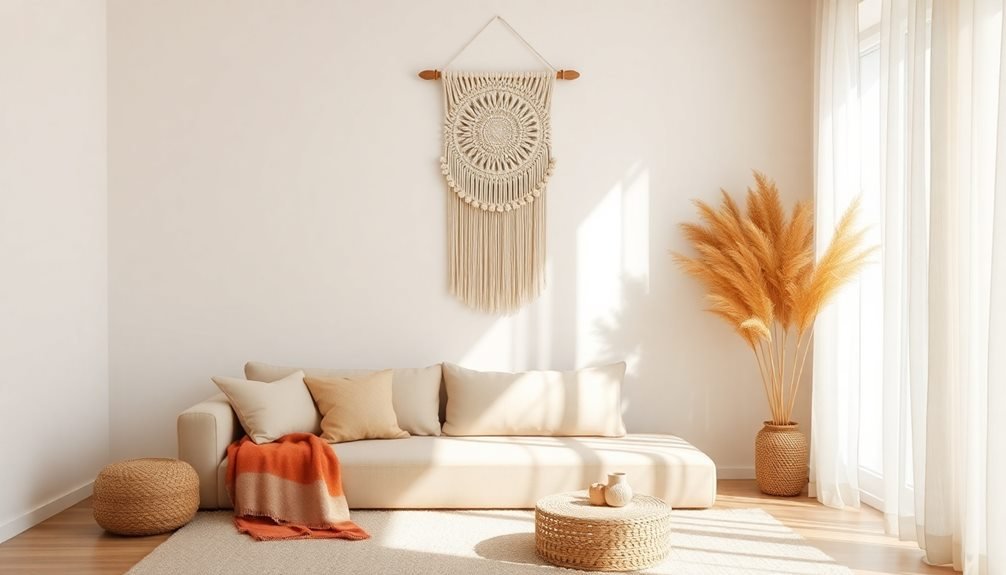
Macramé Dream Catcher
Moving from coastal sounds to ethereal designs, a macramé dream catcher creates a stunning focal point for any wall space.
You'll need a metal or wooden hoop, cotton cord, beads, feathers, and your choice of decorative elements. By mastering a few basic macramé knots, you can weave an intricate web pattern that captures attention and adds texture to your room.
Start by wrapping your hoop with cord, then create the dream catcher's signature web using square knots radiating from the center. Add hanging elements below the main design for movement and visual interest.
You'll find that macramé dream catchers offer endless customization possibilities through different patterns, colors, and embellishments.
- Choose natural cotton cord for a bohemian look, or metallic thread for modern appeal
- Incorporate wooden beads, crystals, or shells to match your décor style
- Layer different sizes of hoops for a more complex design
- Mix various knot patterns to create unique textures
- Add tassels, feathers, or dried flowers for a personalized touch
Hang your finished piece where natural light can filter through it, creating enchanting shadows that change throughout the day.
Floating Botanicals Wall Art

Pressed flowers and leaves transform into striking wall art when suspended between glass panels. You'll need two clear glass frames, pressed botanicals, clear fishing line, and basic mounting hardware to create this ethereal display. The transparency creates the illusion of floating specimens, while natural light passing through adds depth and dimension to your space.
| Material | Purpose | Best For |
|---|---|---|
| Glass Frames | Protection & Display | Modern spaces |
| Pressed Flowers | Focal Elements | Delicate aesthetics |
| Clear Fishing Line | Suspension | Invisible mounting |
Select flowers and leaves that maintain their color when dried – think ferns, pansies, and Japanese maple leaves. Press your botanicals between books for two weeks, or use a flower press for quicker results. Once dried, arrange them between the glass panels, securing with tiny dots of clear adhesive. You'll want to space them evenly to create visual balance.
Mount your finished piece where natural light can filter through. The shadows cast by your botanical specimens will change throughout the day, creating an ever-evolving art piece that brings nature's beauty indoors.
Minimalist String Art
Minimalist string art lets you create striking geometric patterns using just a few basic supplies like nails, wood, and thread.
You'll find that starting with simple shapes – like triangles or diamonds – helps you master the wrapping techniques before moving on to more complex designs.
Once you've gathered your materials and chosen a pattern, you can begin transforming a plain wooden board into modern wall art by following straightforward steps that build on each other.
Easy Step-by-Step Guide
String art's simplicity makes it an ideal weekend project for both beginners and experienced crafters. You'll find that creating minimalist string art requires just a few basic materials and tools: a wooden board, small nails, string or thread, and basic tools like a hammer and ruler.
The end result can transform any room into a serene space with geometric patterns that catch the eye without overwhelming it.
To create your minimalist string art piece:
- Start by choosing a simple design – geometric shapes like triangles, circles, or mountains work best for beginners.
- Mark your nail positions on the board using a pencil and ruler, keeping spacing consistent for a polished look.
- Gently hammer nails halfway into the marked spots, ensuring they're straight and at equal heights.
- Select a monochromatic thread color that complements your room's palette.
- Wrap your string around the nails in your chosen pattern, keeping tension even throughout.
Once you've completed the basic pattern, secure the string's end with a small knot and dab of clear glue.
You'll want to handle the piece carefully while hanging to maintain the string's tension.
Materials and Design Tips
The key to successful minimalist string art lies in selecting quality materials and thoughtful design elements. You'll need a wooden board (preferably pine or birch), small nails with narrow heads, string or thread in your chosen color, and basic tools like a hammer and scissors.
Choose a board size that fits your wall space – 12×12 inches works well for most designs.
For your design, start simple with geometric shapes like triangles, circles, or mountains. You'll want to sketch your pattern lightly on the board first. Space your nails evenly, about 1-1.5 inches apart along your design lines.
When selecting string, consider using embroidery floss or thin cotton cord – they're durable and come in various colors. White, black, or metallic threads create the most striking minimalist look.
Keep your design balanced by maintaining consistent spacing between string layers. Don't overcrowd the space – remember, minimalism emphasizes negative space.
For best results, use a single color scheme and limit yourself to one or two geometric shapes per piece. Seal your wooden board beforehand to prevent warping and protect your artwork.
Ocean Wave Watercolor Display

You'll need watercolor paper, ocean-themed paints, and a rustic wooden frame to create this stunning coastal display piece.
When you're ready to start blending the watercolors, let the blues and teals flow naturally into each other to capture the movement of rolling waves.
Frame your finished artwork in weathered driftwood or a white-washed border to enhance the maritime aesthetic and create a cohesive ocean-inspired look.
Materials and Setup Steps
Preparing for your ocean wave watercolor display requires gathering essential materials from around the house or local craft store. You'll need to set up your workspace in a well-lit area with plenty of room to spread out your supplies and let your artwork dry properly.
- Watercolor paper (140lb or heavier) – guarantees your paper won't buckle under wet media
- Round watercolor brushes (sizes 8 and 12) – perfect for creating fluid wave movements
- Artist-grade watercolors in blues and whites – provides better color saturation than student grade
- Sea salt crystals – creates unique texture effects in your wet paint
- Masking tape and mounting board – keeps your paper flat while working
Start by taping your watercolor paper to a sturdy board, leaving a clean border around the edges. Position your water container on your dominant hand's side and arrange your paints in order of use – from lightest to darkest blues.
Before beginning, test your colors on a scrap piece of paper to understand how they'll blend and flow together. Make certain you've got paper towels nearby for blotting excess water and cleaning your brushes between colors.
Watercolor Blending Techniques
Successfully creating ocean waves in watercolor requires mastering several essential blending techniques.
You'll need to start with a wet-on-wet approach, applying clean water to your watercolor paper before introducing your first layer of paint. Begin with light blue at the top of your wave, gradually working your way down with deeper blues and teals.
For realistic wave movement, you'll want to use a combination of lifting and layering. While your initial wash is still damp, lift some color using a clean, damp brush to create white caps and foam patterns.
Once this layer dries, apply darker values in the wave's shadows using a dry brush technique. You can create texture by spritzing small water droplets onto semi-dry paint.
To achieve depth, layer transparent washes of blue and green, waiting for each layer to dry completely. Use a fan brush to create delicate spray effects at the wave's crest.
For finishing touches, add white gouache highlights sparingly to represent foam and spray. Don't forget to preserve some white paper for the brightest highlights – these areas will give your waves that natural luminosity.
Ocean-Inspired Frame Design
The perfect frame design can dramatically enhance your ocean wave watercolor piece, transforming it into a stunning wall display. Choose a frame style that complements the fluid nature of ocean waves while adding coastal elements that bring depth to your artwork.
You'll want to select materials that withstand humidity and maintain their appearance over time.
- Create a weathered driftwood effect by lightly sanding a wooden frame and applying a whitewash technique with watered-down paint.
- Layer small seashells, sea glass, and sand dollars in the corners using marine-grade epoxy.
- Incorporate rope details by wrapping natural jute cord around the frame's outer edge in a nautical pattern.
- Add depth with a double mat using soft blue inner mat and ivory outer mat to mimic seafoam.
- Paint thin metallic lines on the frame's inner edge to catch light like water reflections.
When mounting your ocean watercolor, leave enough space between the glass and artwork to create subtle shadows.
Position your frame away from direct sunlight to protect the watercolors and maintain the integrity of your natural decorative elements.
Consider using UV-protective glass to prevent fading and preserve your ocean-inspired creation.
Mandala Wood Slice Art
Beautiful mandala designs take on a rustic charm when painted on natural wood slices. To create your own mandala wood art, you'll need a dried wood slice with a smooth surface, acrylic paints, and fine-tipped brushes.
Start by sanding the wood slice until it's completely smooth, then seal it with a clear wood sealer to prevent paint bleeding.
Begin your mandala design by marking the center point and drawing concentric circles using a compass. You can sketch your pattern lightly with a pencil first, focusing on symmetrical geometric shapes that radiate from the center. Work with lighter colors initially, then layer darker shades to create depth and contrast.
Don't worry about perfect symmetry – slight imperfections add character to your piece.
For hanging, drill a small hole at the top of your wood slice and thread natural twine through it. You can create a collection of different-sized mandala wood slices and arrange them in a cluster on your wall.
Consider using metallic paints for accent details or incorporating dots, curves, and geometric patterns that reflect your personal style. Seal your finished piece with a clear protective coating to preserve the design.
Dried Lavender Hanging Bouquets

Moving from painted wood to nature's own artwork, dried lavender bouquets bring both visual appeal and aromatic charm to your walls.
You'll need fresh lavender stems, twine or ribbon, scissors, and wall hooks to create these elegant hanging displays. The key is to harvest or purchase lavender when it's just starting to bloom, ensuring the best color retention and strongest fragrance during the drying process.
Bundle 15-20 stems together at the base, securing them tightly with twine. Hang them upside down in a dark, dry space for 2-3 weeks until they're completely dried. Once ready, you can arrange them in various patterns on your wall, from single bouquets to cascading designs.
- Creates a natural air freshener that promotes relaxation and better sleep
- Maintains its color and scent for up to a year when properly dried and displayed
- Adds a touch of Provençal charm to any room
- Requires minimal maintenance – just an occasional light dusting
- Can be easily refreshed by gently spritzing with lavender essential oil
Remember to position your bouquets away from direct sunlight and moisture to preserve their beauty and fragrance longer.
You can also combine them with other dried flowers for more complex arrangements.
Paper Butterfly Garden
You'll need colorful paper, scissors, glue, and a canvas or frame backing to create your enchanting paper butterfly garden wall hanging.
Start by cutting butterflies in various sizes and colors, then experiment with different arrangements on your backing until you've found a pleasing composition.
Give your display more visual interest by slightly bending the butterfly wings upward and layering some butterflies over others to create a natural, three-dimensional effect.
Materials and Basic Steps
Creating a paper butterfly garden wall display starts with gathering essential materials: colored cardstock or origami paper, scissors, clear fishing line, small adhesive hooks, and a pencil for tracing.
You'll want to select papers in complementary colors that match your room's aesthetic, ranging from soft pastels to bold, vibrant hues.
The basic steps follow a simple progression that'll transform your blank wall into a dynamic butterfly display. First, you'll need to trace and cut multiple butterfly shapes in varying sizes. To add depth and dimension, fold each butterfly slightly at the center to create a natural, flying position.
- Create a layout plan on the floor before mounting – this helps visualize the final arrangement.
- Attach clear fishing line to each butterfly using tiny glue dots or by threading through small holes.
- Install adhesive hooks on the wall in a scattered pattern at different heights.
- Hang butterflies at staggered lengths for a 3D floating effect.
- Adjust the butterflies' angles to create natural movement and flow.
Remember to vary the heights and spacing between butterflies to achieve an organic, garden-like appearance that'll bring your wall to life.
Arranging Your Butterfly Pattern
Once your butterflies are cut and prepared, the artistic arrangement process begins. Lay out your butterflies on a clean floor or large table, experimenting with different formations before committing to the final design.
Create visual balance by placing larger butterflies at the center and gradually decreasing sizes toward the edges of your pattern. To achieve a natural, flying effect, position some butterflies with their wings slightly lifted and others flat against the wall.
Space them 2-3 inches apart in the center, increasing the distance to 4-5 inches near the outer edges. You'll want to arrange them in a loose, ascending spiral pattern or a gentle arc that draws the eye upward.
Before mounting, take a photo of your layout and mark the wall spots with small pencil dots. Start mounting from the center outward, using removable adhesive dots or clear mounting tape.
Bend the wings slightly forward at varying angles between 15 and 45 degrees. If you're working with metallic or iridescent paper, consider how light hits each butterfly to maximize the reflective effect throughout the day.
Adding Depth and Movement
Depth transforms your paper butterfly garden from a flat display into a dynamic, three-dimensional artwork. Create layers by mounting butterflies at varying distances from the wall using clear fishing line or small foam spacers. You'll notice how shadows cast by the raised butterflies add visual interest and create a more natural, garden-like appearance.
To enhance the sense of movement and depth in your display:
- Position smaller butterflies behind larger ones to simulate perspective and distance
- Angle some butterflies slightly upward or downward to suggest flight patterns
- Mount select pieces 1-2 inches from the wall surface for dramatic shadow effects
- Cluster butterflies at different heights to guide the viewer's eye through the composition
- Use clear adhesive dots of varying thicknesses to achieve subtle elevation changes
Consider how natural light interacts with your arrangement throughout the day. Morning and evening light will cast longer shadows, while midday illumination creates shorter, more defined ones.
You can also incorporate small LED lights behind key elements to create gentle evening highlights that make your butterfly garden appear to glow from within.
Frequently Asked Questions
How Long Do Wall Hangings Typically Last Before Needing Replacement?
Your wall hangings can last 5-10 years with proper care. You'll need to replace them sooner if they're exposed to direct sunlight, excessive moisture, or dust. Regular cleaning and maintenance extend their lifespan.
Can These DIY Projects Be Safely Hung in Bathrooms With High Humidity?
You'll need to be careful with bathroom wall hangings due to moisture. It's best to use water-resistant materials and proper sealants, or hang them away from direct shower spray and guarantee good ventilation.
What's the Best Way to Dust Delicate Wall Hangings Without Damaging Them?
You'll want to gently dust delicate wall hangings using a soft feather duster or microfiber cloth. Don't press too hard – just lightly sweep the surface. For extra care, use your vacuum's brush attachment.
Are There Pet-Safe Alternatives for Natural Fibers and Dried Materials?
You'll find many pet-safe natural materials like cotton, linen, and bamboo fibers. Skip toxic dried flowers and opt for preserved eucalyptus, lavender, or palm fronds that won't harm your furry friends if ingested.
How Much Weight Can Standard Wall Anchors Hold for Heavier Art Pieces?
You'll find that standard plastic wall anchors can hold 10-25 pounds, while toggle bolts support 30-50 pounds. For heavier pieces, use multiple anchors or choose heavy-duty metal anchors that support 50-100 pounds.
In Summary
You'll find these DIY wall hangings bring a sense of serenity and natural beauty to your home. Whether you're crafting with natural fibers, pressed flowers, or driftwood, each piece adds unique character and calming energy to your space. Don't be afraid to mix and match these designs or adapt them to fit your style. With just a few materials and some creativity, you're on your way to creating a more peaceful home environment.


Leave a Reply