
Embrace nature photography to calm your mind and ease anxiety outdoors. Choose serene settings like forests or lakeshores, and focus on mindful composition using techniques like the Rule of Thirds. Explore macro photography to discover nature's intricate details. Capture flowing water with slow shutter speeds for a soothing effect. Take advantage of golden hour lighting for softer, more peaceful images. Document seasonal changes to foster regular outdoor activity. Create personal photo projects to channel your creativity. Join nature photography groups for support and shared experiences. Share your images online to inspire others and amplify the anxiety-reducing benefits. These tips are just the beginning of your journey to finding peace through nature photography.
Choose Calming Natural Settings
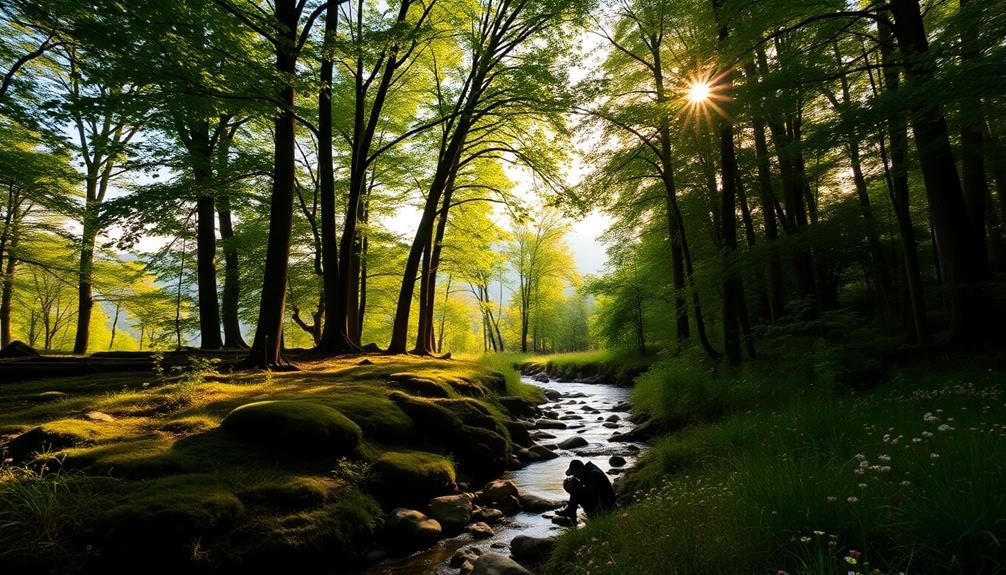
When selecting locations for nature photography to alleviate anxiety, opt for serene environments that naturally promote relaxation. Look for quiet, secluded areas away from urban noise and crowds. Forests, meadows, and lakeshores often provide peaceful settings ideal for calming your mind.
Consider places with gentle, flowing water like streams or waterfalls. The sound of moving water can be particularly soothing and create a tranquil atmosphere for your photography session. Coastal areas with expansive ocean views can also offer a sense of calm and perspective.
Choose locations with diverse plant life, as focusing on intricate details of flowers, leaves, and trees can help shift your attention away from anxious thoughts. Gardens, botanical parks, and nature reserves are excellent options for varied flora.
Timing is essential, too. Early mornings and late afternoons often provide softer light and quieter surroundings. These "golden hours" not only enhance your photos but can also contribute to a more peaceful experience.
Lastly, select locations that feel safe and comfortable to you. Familiarity can help reduce anxiety, so consider starting with nearby parks or nature spots you already know well.
Focus on Mindful Composition
Once you've found your calming natural setting, it's time to approach your photography with mindfulness. Focus on the present moment and let your surroundings guide your composition. Pay attention to the elements that catch your eye and evoke a sense of tranquility.
Consider these mindful composition techniques:
| Technique | Description |
|---|---|
| Rule of Thirds | Divide your frame into a 3×3 grid and place key elements along the lines or intersections |
| Leading Lines | Use natural lines to guide the viewer's eye through the image |
| Symmetry | Create balance by capturing reflections or mirrored elements |
| Negative Space | Incorporate empty areas to emphasize your subject and create a sense of calm |
As you compose your shots, breathe deeply and let go of any tension. Don't rush the process; instead, take your time to explore different angles and perspectives. Notice how the light interacts with your subject and how shadows create depth. By focusing on mindful composition, you'll not only improve your photography skills but also cultivate a sense of peace and presence in nature.
Experiment With Macro Photography
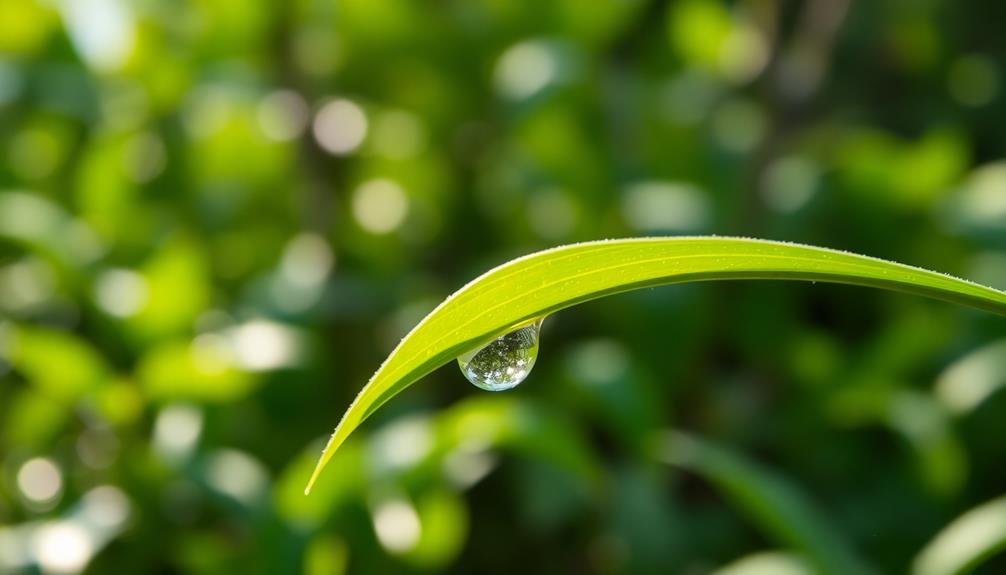
Macro photography offers a unique way to explore nature's intricate details and find tranquility in the small wonders around you. By focusing on tiny subjects, you'll discover a whole new world that often goes unnoticed.
To get started, you don't need expensive equipment; many smartphone cameras have macro settings or attachable lenses.
Look for interesting textures, patterns, and colors in flowers, leaves, insects, or water droplets. Get close to your subject and experiment with different angles. You'll be surprised at how enchanting a single dewdrop or the veins of a leaf can be when magnified.
As you immerse yourself in macro photography, you'll naturally slow down and become more present. This mindful approach can help reduce anxiety and stress. Pay attention to your breathing as you frame your shot and adjust your focus.
The act of carefully observing and capturing these miniature scenes can be meditative and calming.
Don't worry about perfection; instead, enjoy the process of discovery. Each macro shot is an opportunity to appreciate the beauty and complexity of nature, fostering a sense of wonder and connection to the world around you.
Capture Moving Water Scenes
When capturing moving water scenes, you'll want to master slow shutter speed techniques to create those silky, ethereal effects.
Try various waterfall composition strategies, such as framing the cascade with surrounding foliage or incorporating interesting foreground elements.
Don't forget to experiment with polarizing filters, which can reduce glare and enhance the vibrancy of your water shots.
Slow Shutter Speed Techniques
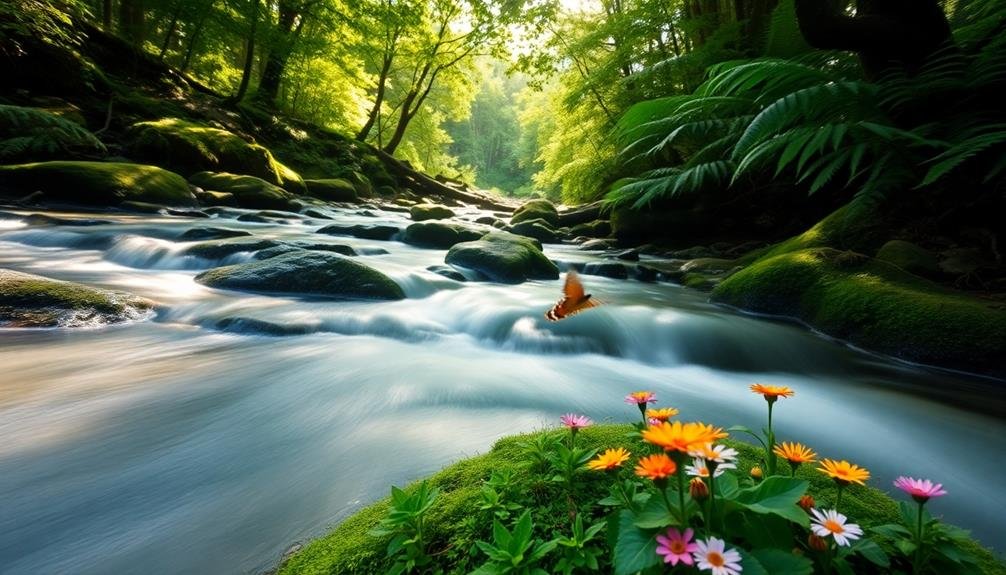
To capture the soothing essence of flowing water in nature, slow shutter speed techniques are invaluable. These methods create a silky, ethereal effect that can enhance the calming properties of your nature photographs.
Start by setting your camera to shutter priority mode or manual mode. Choose a slow shutter speed, typically between 1/15 and 30 seconds, depending on the water's flow rate and the effect you desire.
To achieve this longer exposure, you'll need to stabilize your camera with a tripod. Use a remote shutter release or your camera's self-timer to prevent camera shake. In bright conditions, you might need to use a neutral density filter to reduce the amount of light entering the lens, allowing for longer exposures without overexposure.
Experiment with different shutter speeds to find the perfect balance between smoothness and texture in the water. Remember, slower speeds create a more misty appearance, while slightly faster speeds retain some detail in the water's movement.
Focus on composing your shot to include interesting elements like rocks or foliage alongside the flowing water, creating a harmonious and anxiety-reducing image that captures nature's tranquil beauty.
Waterfall Composition Strategies
Building on the techniques for capturing flowing water, let's focus on waterfall composition strategies. When photographing waterfalls, consider the rule of thirds to create balanced and visually appealing images. Position the waterfall along one of the vertical lines, allowing space for the surrounding landscape.
Use leading lines to draw the viewer's eye towards the waterfall. This can be achieved by incorporating rocks, fallen trees, or the stream itself in the foreground. Experiment with different angles and perspectives to find the most compelling composition. Sometimes, getting low to the ground or climbing to a higher vantage point can dramatically improve your shot.
Include elements that provide scale, such as trees or boulders, to convey the waterfall's size and power.
Don't forget about the foreground and background – they can add depth and context to your image. Try framing the waterfall with overhanging branches or rock formations to create a natural border.
Lastly, consider the water's journey before and after the fall. Capturing the stream above or the pool below can tell a more complete story and add interest to your composition.
Experiment With Polarizing Filters
A polarizing filter is a game-changer for capturing moving water scenes. It reduces glare and reflections, enhancing the clarity and vibrancy of your images. When you're photographing waterfalls, streams, or lakes, this filter can help you achieve that silky smooth water effect while maintaining detail in the surrounding landscape.
To use a polarizing filter effectively, screw it onto your lens and rotate it slowly while looking through your camera's viewfinder. You'll notice the changes in reflections and color saturation as you turn it. Experiment with different angles to find the ideal position for your shot.
Here's a quick guide to using polarizing filters for water photography:
| Scenario | Effect | Best Use |
|---|---|---|
| Waterfalls | Reduces spray reflections | Midday |
| Streams | Enhances underwater details | Morning/Evening |
| Lakes | Eliminates surface reflections | Anytime |
| Ocean | Deepens sky color | Sunny days |
| Wet rocks | Increases color saturation | After rain |
Practice Slow Shutter Speed Techniques
Slow shutter speed techniques can transform your nature photography and provide a calming, meditative experience.
You'll discover how to capture the silky flow of waterfalls, create mesmerizing light trails from stars or city lights at night, and artfully blur moving subjects like birds or leaves.
These methods not only produce stunning images but also encourage you to slow down and immerse yourself in the moment, enhancing the anxiety-relieving benefits of your photography practice.
Capturing Water Movement
Three key techniques can help you capture mesmerizing water movement in nature photography.
First, use a slow shutter speed, typically between 1/15 and 1 second, to create a silky smooth effect on flowing water. This works well for waterfalls, streams, and ocean waves.
Second, employ a neutral density filter to reduce the amount of light entering your camera, allowing for longer exposures even in bright conditions. This helps you achieve that dreamy, ethereal look in your water shots.
Lastly, experiment with different compositions to showcase water's dynamic nature. Try capturing reflections in still pools, or focus on the patterns created by ripples and eddies.
Don't forget to stabilize your camera with a tripod to avoid blur from camera shake during long exposures.
As you practice these techniques, you'll find that photographing water movement can be a meditative and calming experience. The process of observing and capturing the fluid motion of water can help you stay present in the moment, reducing anxiety and promoting a sense of peace and connection with nature.
Light Trails at Night
In addition to capturing water movement, practicing slow shutter speed techniques with light trails at night can be an exciting way to reduce anxiety through photography.
You'll need a sturdy tripod, a camera with manual settings, and a remote shutter release or self-timer. Find a safe location with a clear view of traffic or other moving light sources.
Set your camera to manual mode and adjust the aperture to f/8 or f/11 for a good depth of field. Choose a low ISO (100-400) to minimize noise. Start with a shutter speed of 10-30 seconds and experiment from there. Focus manually on a stationary object in your composition.
As you wait for the exposure, take deep breaths and focus on the present moment. Watch the lights move through your frame, creating streaks of color against the dark background. This mindful observation can help calm your thoughts and reduce anxiety.
After each shot, review your image and make adjustments as needed. Try different angles, compositions, and shutter speeds to achieve varied effects.
Blurring Moving Subjects
While light trails offer one avenue for slow shutter speed photography, blurring moving subjects provides another exciting opportunity to practice this technique and alleviate anxiety. To capture motion blur, you'll need to use a slower shutter speed, typically between 1/15 and 1 second, depending on your subject's speed.
Start by finding a moving subject in nature, such as flowing water, swaying trees, or birds in flight. Set your camera on a tripod to keep it steady, and switch to shutter priority mode or manual mode. Adjust your ISO to a low setting and narrow your aperture to compensate for the longer exposure time.
As you experiment with different shutter speeds, you'll notice how the blur effect changes. For waterfalls or streams, try shutter speeds around 1/2 to 1 second to create a silky smooth effect. For moving clouds or grass, you might need even longer exposures of several seconds.
Don't be afraid to play with various shutter speeds to achieve different results. The process of experimenting and focusing on your craft can help calm your mind and reduce anxiety, allowing you to immerse yourself in the natural world around you.
Seek Out Wildlife Encounters
Venture into nature's hidden corners to seek out wildlife encounters. As you explore, keep your camera ready and your senses alert. Wildlife photography can be incredibly rewarding, offering a unique perspective on the natural world while helping to calm your mind and reduce anxiety.
To increase your chances of spotting animals, research local habitats and migration patterns. Visit during dawn or dusk when many creatures are most active. Move slowly and quietly, blending into your surroundings as much as possible. When you do spot wildlife, observe their behavior from a safe distance before attempting to photograph them.
Remember, the goal isn't just to capture stunning images but to connect with nature and find peace. As you photograph wildlife, consider these deeper meanings:
- Patience: Learning to wait for the perfect moment teaches you to slow down and appreciate the present.
- Respect: Observing animals in their natural habitat fosters a sense of reverence for all living things.
- Perspective: Witnessing the intricacies of wildlife behavior helps put your own worries into perspective.
Embrace Golden Hour Lighting
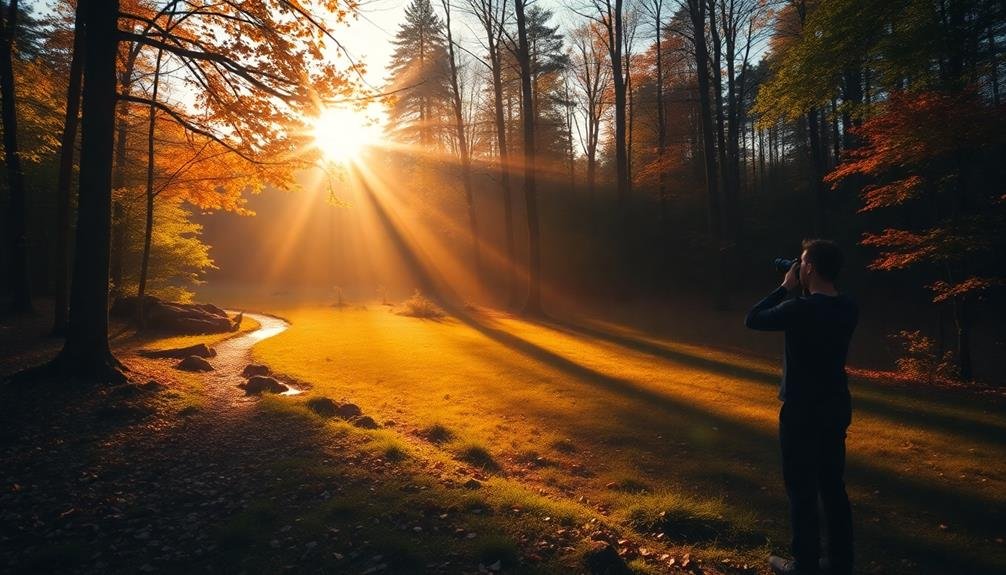
Golden hour lighting can transform an ordinary landscape into a breathtaking scene. This magical time occurs twice daily, just after sunrise and before sunset, when the sun's low angle casts warm, soft light across the landscape.
To capture this enchanting light, you'll need to plan ahead and arrive at your chosen location well before the golden hour begins.
During this time, you'll notice long shadows, vibrant colors, and a warm glow that bathes everything in a golden hue. It's the perfect opportunity to photograph landscapes, silhouettes, and backlit subjects.
Experiment with different compositions, using the sun's position to create dramatic effects. Try shooting towards the sun for lens flares or use it as a backlight for subjects.
Don't forget to adjust your camera settings to make the most of this fleeting light. Use a wider aperture to capture more light, and consider increasing your ISO slightly if needed.
A tripod can be helpful for longer exposures in low light conditions. Remember, the golden hour doesn't last long, so work quickly and efficiently to capture its essence before it fades.
Document Seasonal Changes
As the seasons change, nature provides an ever-evolving canvas for photographers to explore. Documenting these shifts can be a powerful tool for managing anxiety, as it encourages mindfulness and connection with the natural world.
You'll find that focusing on seasonal changes offers a unique perspective on the passage of time and the cyclical nature of life. To capture the essence of each season, pay attention to the subtle shifts in your environment. Look for changes in foliage colors, wildlife behavior, and weather patterns.
You might choose a specific location to photograph throughout the year, creating a visual timeline of nature's transformations.
Documenting seasonal changes can benefit your mental health in several ways:
- It promotes patience and acceptance of change
- It encourages regular outdoor activity and exercise
- It fosters a sense of wonder and appreciation for nature's beauty
Create Personal Photo Projects
Personal photo projects can be a powerful way to channel your creativity and manage anxiety through nature photography. By setting specific goals and themes for your outdoor shoots, you'll give your mind a focused outlet for expression and stress relief.
Start by choosing a subject that resonates with you, such as local wildlife, wildflowers, or landscapes. Then, decide on a timeframe for your project, whether it's a 30-day challenge or a year-long endeavor. This structure will help you stay motivated and track your progress.
Consider creating a photo series that explores different aspects of your chosen subject. For example, you could document the life cycle of a particular plant or capture the same location in various weather conditions. Alternatively, try a scavenger hunt-style project where you aim to photograph specific elements in nature, like textures, colors, or shapes.
As you work on your project, don't forget to reflect on your experiences. Keep a journal to record your thoughts and feelings alongside your images. This practice can help you process emotions and gain insights into how nature photography impacts your anxiety levels.
Share Your Nature Images
Sharing your nature photographs can amplify the anxiety-reducing benefits of your hobby. You can inspire others by posting your images on social media platforms or photography websites, potentially helping them find solace in nature as well.
Consider creating or joining local nature photography groups to connect with like-minded individuals, share experiences, and organize group outings to explore new natural settings together.
Inspire Others Online
Your nature photography can inspire and uplift others when shared online. By posting your images on social media platforms or photography websites, you're not only sharing your anxiety relief journey but also encouraging others to connect with nature.
Choose platforms like Instagram, Flickr, or 500px to showcase your work and engage with fellow nature enthusiasts.
When sharing your photos, include thoughtful captions that describe your experience or the emotions the scene evoked. This personal touch can help viewers relate to your images on a deeper level.
Don't forget to use relevant hashtags to increase your photos' visibility and reach a wider audience interested in nature and mental health.
Consider creating a blog or website dedicated to your nature photography and anxiety relief journey. This platform allows you to:
- Share longer stories behind your images
- Offer tips and advice for others struggling with anxiety
- Build a community of like-minded individuals
Create Nature Photo Groups
Driven by a shared passion for nature and photography, creating or joining nature photo groups can greatly enhance your anxiety relief journey. These groups offer a supportive community where you can share your images, learn from others, and find motivation to continue exploring the outdoors.
Start by searching for existing local nature photography groups on social media platforms or community websites. If you can't find one that suits your needs, consider starting your own. Create a Facebook group or use platforms like Meetup to gather like-minded individuals.
Organize regular outings to nearby parks, nature reserves, or scenic locations. These group excursions provide opportunities to practice your skills, discover new locations, and forge connections with fellow nature enthusiasts.
You'll benefit from shared knowledge about camera settings, composition techniques, and local flora and fauna.
Encourage group members to share their photos and experiences through online galleries or in-person exhibitions. This fosters a sense of accomplishment and allows you to see nature through different perspectives.
Don't forget to establish guidelines for respectful feedback and constructive criticism to maintain a positive, anxiety-reducing environment.
Frequently Asked Questions
What Camera Equipment Is Essential for Beginner Nature Photographers?
You'll need a decent DSLR or mirrorless camera with a versatile lens, like an 18-55mm. Don't forget a sturdy tripod, spare batteries, and memory cards. A polarizing filter can enhance colors and reduce glare in your shots.
How Can I Protect My Camera Gear in Various Weather Conditions?
You'll need weatherproof bags or cases for your gear. Use rain covers for cameras and lenses in wet conditions. Keep silica gel packets handy to absorb moisture. Don't forget lens cloths to wipe off water droplets or condensation.
Are There Any Safety Precautions to Consider When Photographing Wildlife?
When photographing wildlife, prioritize your safety. Keep a safe distance, don't disturb habitats, and use telephoto lenses. Be aware of your surroundings, research local wildlife, and follow park guidelines. Never feed animals or approach them closely.
What Are the Best Locations for Nature Photography Near Urban Areas?
You'll find great nature photography spots near urban areas in city parks, botanical gardens, and nearby state parks. Don't overlook local lakes, rivers, and nature reserves. Even small green spaces can offer surprising opportunities for capturing wildlife and flora.
How Can I Legally Use My Nature Photographs for Commercial Purposes?
You'll need to secure proper permissions and releases. Always obtain property releases for private locations and model releases for recognizable people. Consider copyright laws, and make certain you're not infringing on protected landmarks or artwork in your photos.
In Summary
You've now got a toolkit of nature photography techniques to ease anxiety and connect with the outdoors. Remember, it's not about perfection but the process. As you practice these tips, you'll find yourself more present and relaxed in nature. Don't be afraid to experiment and develop your own style. Your unique perspective matters. Keep exploring, shooting, and sharing your journey. Nature's beauty is waiting for you to capture it.


Leave a Reply