
Transform your living space into a tranquil sanctuary with thoughtful upcycling projects that won't break the bank. You can create serene meditation lamps from repurposed glass jars, craft natural fiber wall hangings from old cotton rope, or design a zen garden coffee table for mindful moments. Turn driftwood into stunning wall shelves, convert vintage windows into plant sanctuaries, and build memory boxes from old cigar cases. Even your fabric scraps can become textured wall art that adds dimension and personality. These sustainable projects help you build a calming atmosphere while giving new purpose to everyday items. Discover how simple materials can elevate your space's zen factor.
Repurposed Glass Jar Meditation Lamps
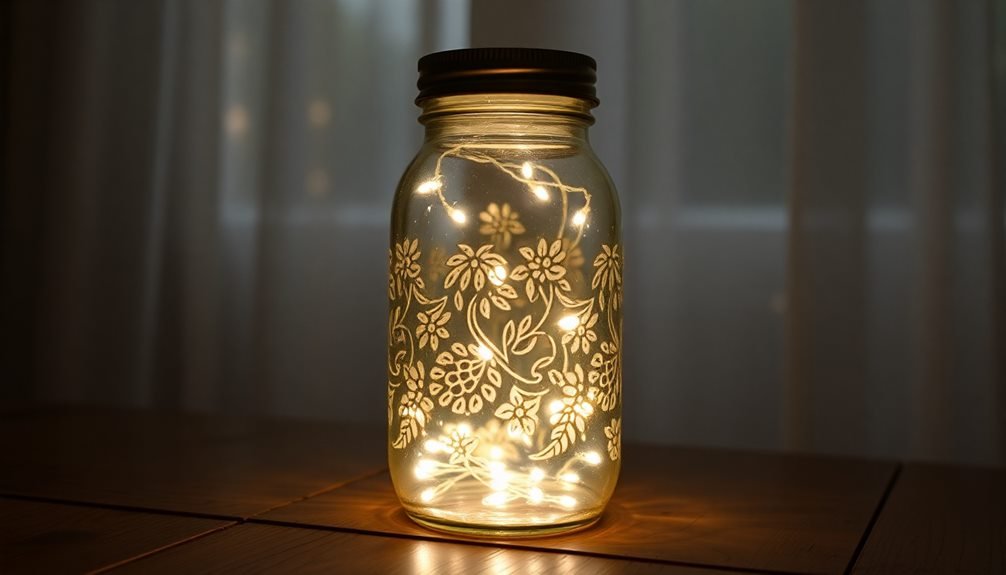
Glass jars possess endless potential for creative transformation. By converting ordinary mason jars or pasta containers into meditation lamps, you'll create ambient lighting that enhances your space's tranquil atmosphere while reducing waste.
To craft your meditation lamp, thoroughly clean and dry your chosen jar, removing all labels and adhesive residue. Apply frosted glass spray paint or etching cream to create a diffused effect that softens the light. You can also use glass paint markers or stencils to add mandala patterns, spiritual symbols, or nature-inspired designs.
Install a battery-operated LED light string or flameless candle inside the jar for safe illumination. If you're comfortable with basic wiring, convert your jar into a plug-in lamp using a cord kit and low-wattage bulb.
Position multiple lamps at different heights using wooden blocks or small pedestals to create visual interest.
For added serenity, fill the bottom third of your jar with natural elements like sand, small pebbles, or dried lavender before adding the light source.
Place these lamps in your meditation corner, bathroom, or bedroom to establish calm focal points that promote mindfulness and relaxation.
Natural Fiber Wall Hangings
Texture and warmth come alive through natural fiber wall hangings, which offer an eco-conscious way to dress up bare walls while reusing materials from around your home.
You'll find these materials hiding in plain sight: old cotton rope, frayed sweaters, worn-out scarves, discarded yarn, and even natural twine from packaging.
To create your wall hanging, start by building a base using a sturdy wooden branch or metal rod. Unravel your chosen fibers and sort them by length and thickness. You can dye natural materials using tea, coffee, or plant-based dyes to achieve your desired color palette.
Experiment with basic macramé knots or simple weaving techniques to form interesting patterns. Layer different textures by combining thin and thick fibers, or incorporate found objects like driftwood, copper wire, or wooden beads.
Create depth by varying the spacing between strands and mixing straight sections with braided elements. Don't worry about perfection – asymmetry adds character to these organic pieces. Secure loose ends by knotting or weaving them back into the design.
You'll find that each piece develops its own personality as you work, reflecting both your creativity and your commitment to sustainable décor.
Zen Garden Coffee Table
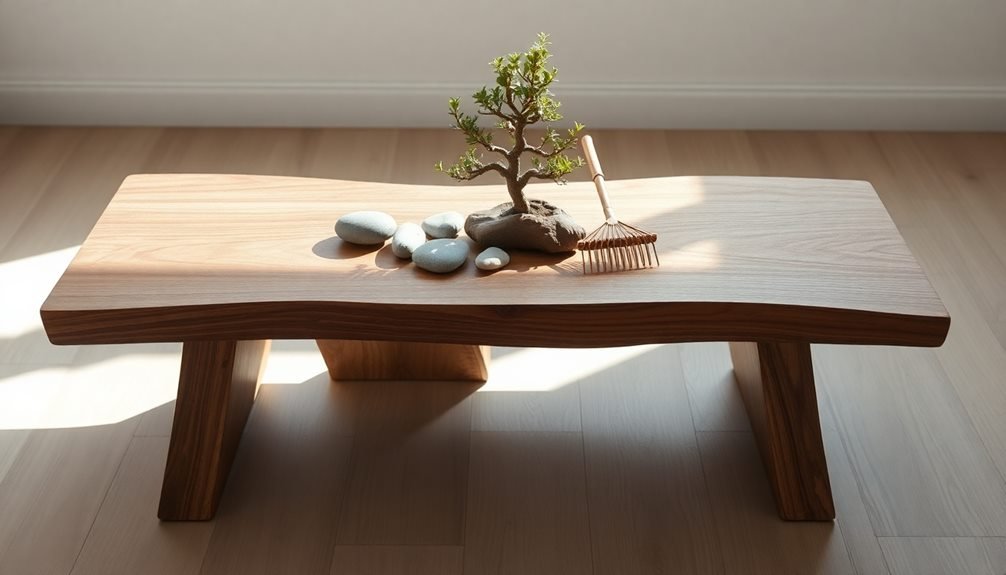
Building on the concept of natural elements in home décor, a Zen garden coffee table brings mindful design to your living room's centerpiece. You'll need a shallow wooden coffee table with a glass top, fine sand, miniature rocks, and small bamboo rakes to create this meditative piece.
Start by removing the glass top and creating a 2-inch deep recess in the table's surface. Line it with a waterproof sealant to protect the wood from sand moisture. Pour a layer of fine, light-colored sand until it's level with the table's edges. Arrange smooth river stones, polished pebbles, or crystals in meaningful patterns across the sand's surface.
Place the glass top slightly above the sand level using discrete spacers, allowing you to rake patterns without disturbing the glass. You'll want to include a small drawer or hidden compartment for storing your miniature rake and additional decorative elements.
The table becomes both functional furniture and an interactive art piece where you can practice mindfulness by creating new sand patterns. When you're entertaining, the clear glass top serves as a stable surface while showcasing your zen garden beneath.
Driftwood Shelving Displays
Transform your collected driftwood pieces into striking wall shelves that blend natural coastal elements with modern storage solutions.
You'll need basic brackets, a level, and sturdy screws to mount your beach-found treasures securely to the wall.
Create visual interest by arranging multiple driftwood shelves in asymmetrical patterns or clustering them in organic groupings that showcase your favorite decorative items.
Natural Beach-Found Design Elements
Nature's most compelling design elements can be found washed up along the shoreline, with driftwood being a prime candidate for elegant DIY shelving.
You'll want to collect pieces that are thoroughly dried and naturally smoothed by the ocean, ensuring they're free from bark and debris. Before bringing them indoors, clean each piece with a mixture of bleach and water to eliminate any salt residue or organisms.
When selecting your driftwood, look for relatively straight pieces with interesting grain patterns and natural curves that'll work well as shelf supports. You can create striking wall arrangements by combining multiple pieces of varying sizes, securing them firmly with hidden brackets and proper wall anchors.
Don't limit yourself to just driftwood – incorporate other beach findings like smooth stones, sea glass, and shells to add visual interest to your displays.
For a cohesive look, consider grouping similar items together on your shelves. You might arrange collections of white coral on one level, while displaying weathered sea glass on another.
Remember to seal your driftwood pieces with a clear, water-based polyurethane to protect them and enhance their natural beauty.
Simple Installation Methods Required
Installing your driftwood shelving doesn't require advanced carpentry skills or specialized tools. You'll need basic items like a drill, wall anchors, brackets, and screws to create a secure display. Before mounting, clean your driftwood pieces thoroughly and seal them with a clear protective coating to prevent deterioration.
| Installation Step | Required Materials |
|---|---|
| Wall Preparation | Level, pencil, stud finder |
| Bracket Mounting | Wall anchors, screws, drill |
| Wood Attachment | L-brackets, wood screws |
| Final Touches | Clear sealant, sandpaper |
Select a wall location that can support your shelving weight and mark your mounting points with a level to guarantee straight alignment. When drilling into drywall, always use appropriate anchors to distribute the weight evenly. For heavier pieces, secure the brackets directly into wall studs.
Attach L-brackets to your driftwood using short wood screws, being careful not to split the wood. Test the stability of your shelf before displaying items. Consider incorporating rope or chain supports for a nautical aesthetic while adding extra security. You'll achieve both function and coastal charm with minimal tools and effort.
Creative Display Layout Options
Driftwood shelves offer endless possibilities for creative arrangement and visual appeal. You'll find that staggering multiple pieces at varying heights creates a dynamic wall display that draws the eye upward. For a balanced look, arrange larger driftwood pieces at the bottom and gradually decrease shelf sizes as you move up the wall.
Consider grouping your shelves in asymmetrical clusters to add visual interest. You can create a flowing organic pattern by installing three to five pieces that follow a gentle curve or wave-like formation.
For a more structured appearance, align your driftwood shelves in a geometric pattern, such as a triangle or diamond shape.
Don't limit yourself to horizontal arrangements. Try mounting some pieces vertically or at slight angles to mimic natural beach formations. You can also experiment with depth by positioning some shelves closer to the wall and others jutting out further.
When displaying items, maintain visual harmony by alternating between taller and shorter objects, and mix textures like smooth ceramics with rough-hewn materials. Leave some areas open to prevent the display from appearing cluttered, allowing each driftwood piece to showcase its unique character.
Vintage Window Plant Sanctuary
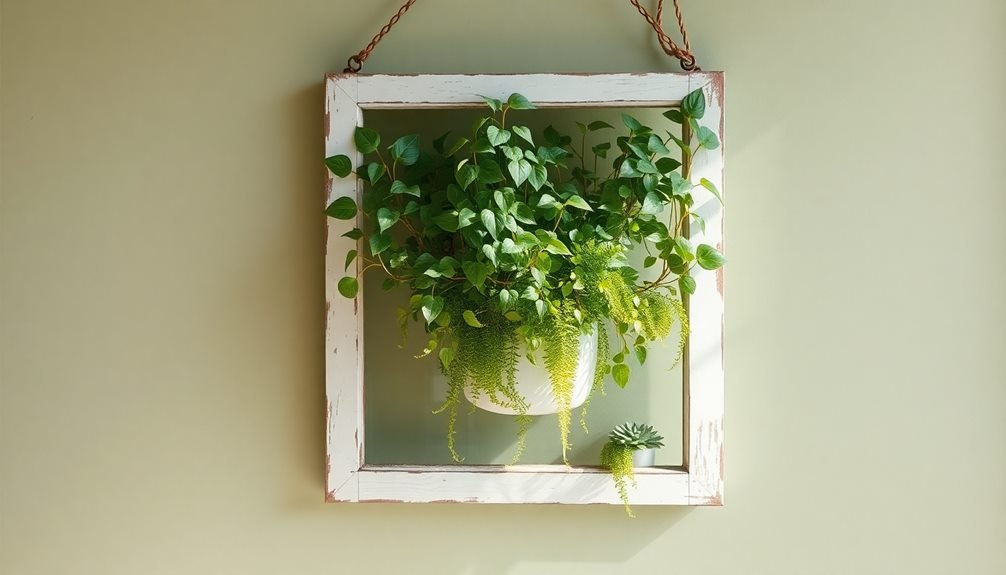
Transform a discarded vintage window frame into a striking plant sanctuary that breathes new life into your living space. Start by thoroughly cleaning the frame and replacing any broken glass panes.
You'll want to reinforce the structure by securing loose joints and applying weather-resistant sealant to protect against moisture from your plants.
Mount small shelves or hooks along the window frame's crossbars to create multiple levels for displaying your plants. Select a variety of air plants, succulents, and trailing vines that thrive in indoor conditions.
You can attach miniature terrariums to the glass panes using strong suction cups, creating depth and visual interest. Consider adding LED strip lighting behind the frame to illuminate your plants and create a soft, ambient glow.
Install the transformed window frame on a wall that receives indirect sunlight, guaranteeing your plants get adequate light without scorching.
You'll need to plan for water drainage by placing waterproof catch trays beneath hanging plants. Maintain your sanctuary by misting plants weekly and rotating them seasonally to guarantee even growth.
This living art piece won't just purify your air; it'll serve as a conversation-starting focal point that connects indoor comfort with outdoor elements.
Mindful Memory Box Creation
A cherished cigar box or vintage suitcase can become your personalized mindful memory box, serving as both a decorative piece and a meaningful storage solution. Transform your container by sanding rough edges, applying a fresh coat of paint or decorative paper, and adding personal touches like vintage hardware or meaningful quotes.
Create designated sections within your box using dividers made from reclaimed wood or sturdy cardboard. You'll want to organize your items thoughtfully to maintain the box's serenity and purpose.
| Memory Type | Storage Ideas |
|---|---|
| Photos | Acid-free envelopes |
| Letters | Fabric pouches |
| Trinkets | Small glass jars |
| Tickets | Clear sleeves |
| Nature Items | Cotton sachets |
Place your memory box in a visible spot where you'll interact with it regularly, like your coffee table or bedroom dresser. You can refresh its contents seasonally, adding new memories while reflecting on past ones. Consider incorporating elements that engage multiple senses – pressed flowers for fragrance, textured fabrics for touch, and small bells for sound. This mindful approach to storing memories doesn't just declutter your space; it creates an intentional focal point that tells your story.
Textured Canvas From Old Fabrics
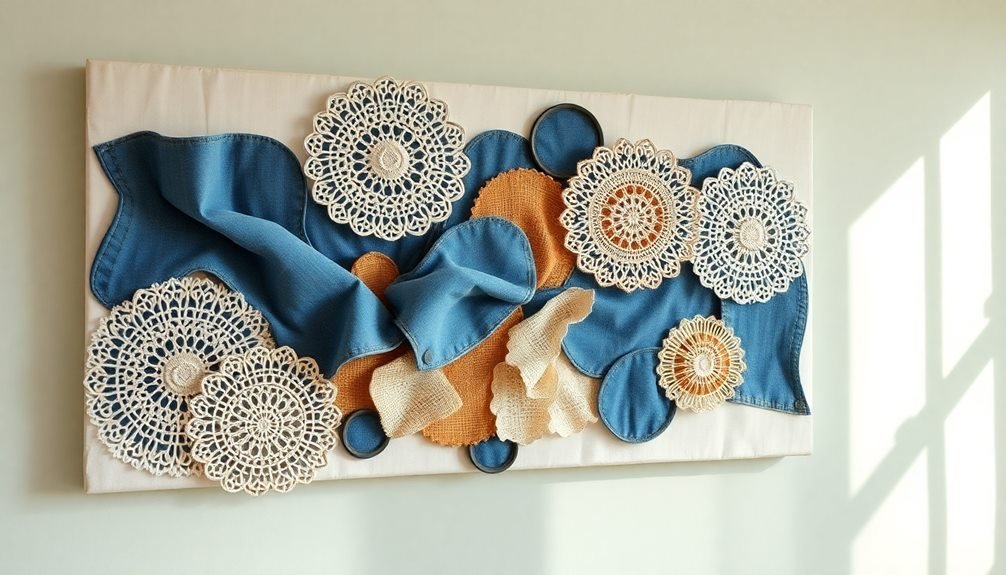
While memory boxes preserve your cherished items, old fabric scraps can become striking wall art that tells its own story. Transform your forgotten textiles into a personalized canvas by selecting fabrics with complementary colors, patterns, and textures that resonate with your space's aesthetic.
Start by stretching a plain canvas over a wooden frame, securing it firmly. Cut your fabric pieces into various shapes – geometric patterns work particularly well. Layer these pieces strategically, beginning with larger sections as the background and working toward smaller details in the foreground.
You'll want to use fabric glue or a hot glue gun to secure each piece, ensuring the edges don't fray. Add depth to your creation by incorporating different fabric weights: combine airy chiffon with sturdy denim, or delicate lace with thick wool.
Don't limit yourself to flat applications – create pleats, twists, or rolled fabric flowers for dimensional interest. Consider adding vintage buttons, ribbons, or embroidery elements as focal points.
Once you've completed your design, seal the entire piece with fabric stiffener to preserve its shape and protect it from dust.
Frequently Asked Questions
How Long Does It Take to Develop Upcycling Skills for Beginners?
You'll develop basic upcycling skills within 1-2 months through regular practice. Start with simple projects like repainting furniture or creating planters. Your confidence and techniques will improve with each completed project.
What Tools Are Essential for Starting Serene Upcycling Projects?
You'll need basic hand tools like screwdrivers, hammers, and sandpaper. Don't forget painting supplies, measuring tape, safety gear, and a glue gun. These essentials will help you tackle most upcycling projects confidently.
Can Upcycling Projects Affect Indoor Air Quality?
Yes, your upcycling projects can impact indoor air quality. When you're sanding, painting, or using adhesives, you'll release particles and VOCs. Keep windows open and use proper ventilation during these activities.
Where Can I Find Free Materials for Sustainable Upcycling?
You'll find free materials at yard sales, thrift stores, Craigslist, Facebook Marketplace, construction sites' dumpsters, and your neighborhood's curb on trash day. Local recycling centers often give away items too.
How Do I Maintain and Clean Upcycled Decorative Pieces?
You'll need to dust regularly with a soft cloth and use mild soap when needed. Keep wood pieces away from direct sunlight, protect metal from moisture, and apply protective sealants to extend the life of upcycled items.
In Summary
You've discovered how simple materials can create peaceful, meaningful spaces through mindful upcycling. Whether you're crafting meditation lamps from old jars or transforming driftwood into elegant shelving, each project adds serenity to your home while reducing waste. Let these sustainable transformations inspire you to see the potential in everyday items. Your living space isn't just becoming more beautiful – it's telling your eco-conscious story.


Leave a Reply