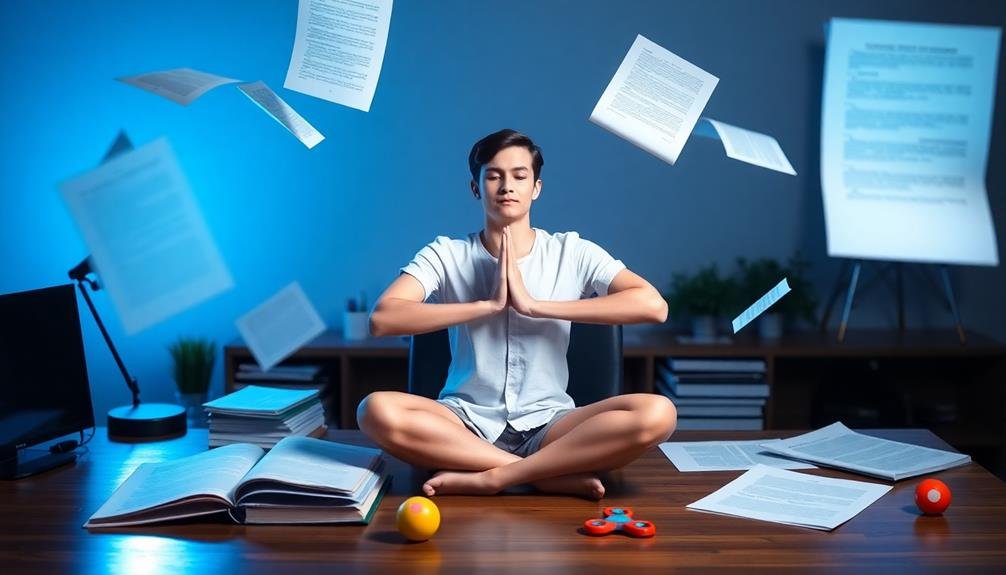
To ease test anxiety, try neck rolls and shoulder shrugs to release upper body tension. The standing forward bend can calm your nerves and improve focus. Cat-cow pose and seated spinal twists help relax your back and enhance circulation. Child's pose and happy baby pose activate your relaxation response, reducing stress. Progressive muscle relaxation and diaphragmatic breathing exercises can further lower anxiety levels. Don't forget simple wrist and finger stretches to relieve writing tension. These stretches are easy to perform discreetly at your desk or during study breaks. Explore these techniques to discover which ones work best for you.
Key Takeaways
- Neck rolls and shoulder shrugs release tension in areas where stress accumulates, providing quick relief during exam preparation.
- The standing forward bend promotes blood flow to the brain, enhancing focus and reducing anxiety before tests.
- Cat-Cow pose combines two stretches to release tension in the spine and improve circulation, ideal for study breaks.
- Legs-Up-the-Wall pose is a restorative position that promotes relaxation and improves concentration before exams.
- Eye palming technique relaxes eye muscles, reduces tension headaches, and calms racing thoughts associated with test anxiety.
Neck Rolls and Shoulder Shrugs

Neck rolls and shoulder shrugs are simple yet effective tension-busters for test-takers. These exercises target areas where stress often accumulates, helping you release physical and mental strain before and during exams.
To perform neck rolls, start by sitting up straight with your shoulders relaxed. Slowly lower your chin to your chest, then gently roll your head to the right, bringing your ear towards your shoulder. Continue the circular motion, tilting your head back, then to the left, and finally returning to the starting position. Repeat this movement 5-10 times in each direction.
For shoulder shrugs, sit or stand with your arms at your sides. Lift your shoulders towards your ears, hold for a few seconds, then release them down. Do this 10-15 times, focusing on the sensation of tension leaving your upper body.
You can combine these stretches for maximum benefit. As you perform them, take deep breaths and visualize your anxiety melting away.
These exercises are discreet enough to do at your desk without drawing attention, making them perfect for last-minute stress relief just before your test begins.
Standing Forward Bend

The standing forward bend offers a full-body stretch that can quickly melt away test anxiety. To perform this stretch, start by standing with your feet hip-width apart. Take a deep breath in, then exhale as you slowly bend forward from your hips. Let your arms hang loose, allowing gravity to pull them towards the floor. Don't worry if you can't touch your toes; just go as far as you comfortably can.
As you hold this position, you'll feel a gentle stretch in your hamstrings, calves, and lower back. This pose helps increase blood flow to your brain, which can improve focus and clarity. It's also known to calm your nervous system, reducing stress and anxiety.
To intensify the stretch, you can gently sway from side to side or nod your head yes and no. Hold the position for 30 seconds to a minute, breathing deeply throughout.
When you're ready to come up, do so slowly to avoid dizziness. Bend your knees slightly and roll up vertebra by vertebra, with your head coming up last. You'll likely feel more relaxed and centered, ready to tackle your test with renewed confidence.
Cat-Cow Pose

This yoga duo combines two complementary poses that can effectively reduce test anxiety. Start on your hands and knees, with your wrists aligned under your shoulders and knees under your hips. As you inhale, arch your back, lifting your chest and tailbone towards the ceiling for Cow Pose. When exhaling, round your spine, tucking your chin to your chest and drawing your navel towards your spine for Cat Pose.
Repeat this fluid movement for 5-10 breaths, focusing on syncing your breath with each change. The Cat-Cow Pose offers several benefits for test anxiety:
- Releases tension in your spine, neck, and shoulders
- Improves circulation and oxygenation to your brain
- Calms your mind by promoting mindful breathing
You'll find this stretch particularly helpful before or during study breaks. It's easy to perform discreetly, even in a classroom or library.
As you flow between the two poses, visualize your worries melting away with each breath. This mental imagery, combined with the physical movement, can greatly reduce anxiety and improve your focus.
Remember to maintain a gentle, controlled pace throughout the exercise.
Seated Spinal Twist

Another effective stretch for alleviating test anxiety is the Seated Spinal Twist. This simple yet powerful pose helps release tension in your spine, shoulders, and hips while promoting better circulation and digestion.
To perform this stretch, start by sitting on the floor with your legs extended in front of you. Bend your right knee and place your right foot on the outside of your left thigh. Then, place your left hand on the floor behind you for support.
As you inhale, lengthen your spine. On the exhale, gently twist your torso to the right, placing your right hand behind you and your left elbow on the outside of your right knee. Hold this position for 30 seconds to a minute, focusing on your breath and feeling the stretch in your spine and hips.
To release, slowly unwind and return to the starting position. Repeat the twist on the other side to balance the stretch.
The Seated Spinal Twist can help calm your nervous system, reduce stress, and improve focus. By incorporating this stretch into your pre-exam routine, you'll feel more centered and prepared to tackle your test with confidence.
Child's Pose

Moving from twists to restorative poses, let's explore Child's Pose. This gentle stretch can help you release tension in your back, shoulders, and neck while calming your mind.
To perform Child's Pose, kneel on the floor with your toes together and knees hip-width apart. Sit back on your heels, then slowly lower your upper body forward, extending your arms in front of you. Rest your forehead on the ground and breathe deeply.
Child's Pose offers several benefits for reducing test anxiety:
- It promotes relaxation by activating your parasympathetic nervous system, which helps counter the stress response.
- The pose encourages deep breathing, increasing oxygen flow to your brain and improving mental clarity.
- It stretches your spine and hips, releasing physical tension that often accompanies anxiety.
Hold this pose for 1-3 minutes, focusing on your breath and allowing your body to sink deeper into the stretch with each exhale.
If you have knee issues, place a folded blanket between your thighs and calves for support.
Legs-Up-the-Wall Pose

After calming your mind with Child's Pose, you can further relax your body with the Legs-Up-the-Wall Pose. This restorative yoga position helps reduce anxiety by promoting blood flow to your brain and relieving tension in your lower back and legs.
To perform this pose, find an empty wall space and sit sideways next to it. Lie on your back and swing your legs up the wall, scooting your buttocks as close to the wall as comfortable. Your body should form an L-shape, with your back flat on the floor and your legs extended vertically. Rest your arms by your sides, palms facing up.
Close your eyes and focus on your breath, allowing gravity to work its magic. You'll feel a gentle stretch in your hamstrings and calves while your lower back releases tension. Stay in this position for 5-15 minutes, or as long as you're comfortable.
This pose is especially beneficial before a test, as it calms your nervous system and reduces stress hormones. It's also an excellent way to combat fatigue and improve concentration, helping you feel more prepared and confident for your exam.
Butterfly Stretch

While the Legs-Up-the-Wall Pose focuses on your lower body, the Butterfly Stretch targets your inner thighs and hips. This gentle stretch can help release tension and promote relaxation, making it an excellent choice for easing test anxiety.
To perform the Butterfly Stretch:
- Sit on the floor with your back straight and bring the soles of your feet together.
- Draw your heels as close to your body as comfortable, allowing your knees to drop towards the floor.
- Hold onto your ankles or feet and gently press your knees down with your elbows.
As you hold this position, take deep breaths and focus on releasing any tension in your hips and thighs. You'll feel a stretch along your inner thighs and groin area.
Don't force your knees down; instead, let gravity do the work. Hold the stretch for 30 seconds to 2 minutes, depending on your comfort level.
The Butterfly Stretch can help improve your flexibility and reduce muscle tension, which often builds up during stressful study sessions.
Wrist and Finger Stretches

Two often-overlooked areas of tension during test anxiety are your wrists and fingers. These parts of your body can become strained from prolonged writing or typing during exams.
To relieve this tension, try these simple stretches:
First, extend your arms in front of you with your palms facing down. Gently bend your wrists upward, feeling the stretch along the underside of your forearms. Hold for 15 seconds, then bend your wrists downward for another 15 seconds.
Next, make a loose fist with each hand, then slowly open your fingers as wide as possible. Repeat this 5-10 times.
For individual finger stretches, gently pull each finger back towards your wrist, holding for a few seconds.
Then, interlace your fingers and push your palms away from your body, extending your arms forward. Hold this position for 15-20 seconds.
Eye Palming

Eye palming is a simple yet effective technique to relieve eye strain and reduce anxiety during test preparation.
You'll start by rubbing your hands together to generate warmth, then gently cup your palms over your closed eyes without applying pressure.
For best results, maintain this position for 1-2 minutes and repeat the process 3-4 times throughout your study session.
Technique and Benefits
To perform eye palming, start by rubbing your hands together vigorously until they're warm. Then, gently cup your palms over your closed eyes, making sure not to apply pressure directly on your eyeballs. Keep your fingers relaxed and slightly curved, allowing no light to enter. Breathe deeply and hold this position for 1-3 minutes.
Eye palming offers several benefits that can help ease test anxiety:
- Relaxes eye muscles: By giving your eyes a break from visual stimuli, you're allowing the muscles around them to relax, reducing tension headaches often associated with stress.
- Calms the mind: The darkness and gentle pressure can help quiet racing thoughts, allowing you to refocus and center yourself.
- Improves concentration: After eye palming, you'll likely find your vision clearer and your ability to focus enhanced, which is essential during exams.
You can practice eye palming before an exam or during study breaks. It's a quick, simple technique that doesn't require any special equipment, making it easy to incorporate into your test preparation routine.
Remember to breathe slowly and deeply while performing this exercise to maximize its calming effects.
Proper Eye Palming Position
When practicing eye palming, proper positioning is essential for maximum effectiveness. Start by finding a comfortable seated position, either at a desk or on the floor.
Place your elbows on a flat surface, ensuring they're shoulder-width apart. Cup your palms over your closed eyes, creating a gentle seal without applying pressure to your eyeballs. Your fingers should rest on your forehead, with your pinky fingers near your nose.
Make sure there's no light seeping through your palms. You'll want complete darkness to allow your eyes to fully relax. Keep your spine straight and shoulders relaxed. If you're at a desk, use a cushion or pillow to support your elbows and maintain proper alignment.
Breathe deeply and slowly, focusing on the darkness and the sensation of your palms over your eyes. Hold this position for 3-5 minutes, or longer if you're comfortable.
As you practice, you may notice your eyes becoming more relaxed and any tension in your face dissipating. Remember to blink a few times when you remove your hands, allowing your eyes to readjust gradually to the light.
Duration and Repetition
Regularly practicing eye palming can greatly reduce test anxiety, but it's crucial to understand the best duration and frequency. For best results, aim to palm your eyes for 3-5 minutes at a time. This duration allows your eyes and mind to fully relax without causing discomfort or boredom.
As for repetition, try to incorporate eye palming into your daily routine, especially during study sessions or before exams.
To maximize the benefits of eye palming, follow these guidelines:
- Start with shorter sessions of 1-2 minutes and gradually increase to 5 minutes as you become more comfortable with the technique.
- Practice eye palming at least twice daily, ideally in the morning and evening, to maintain a consistent relaxation routine.
- During intense study periods or before exams, increase the frequency to 3-4 times a day to manage stress levels more effectively.
Progressive Muscle Relaxation

Progressive muscle relaxation is a powerful technique to combat test anxiety.
You'll systematically tense and relax different muscle groups, promoting overall calmness and reducing physical tension.
This method not only helps during exams but can be practiced regularly to improve your stress management skills.
Step-By-Step Relaxation Technique
Before diving into the exam material, take a few minutes to practice Progressive Muscle Relaxation (PMR). This technique helps you release tension throughout your body, calming your nerves and improving focus. Find a comfortable position, either sitting or lying down, and close your eyes. Begin by taking slow, deep breaths.
Start the PMR process with these steps:
- Tense and relax your muscles: Begin with your toes, curling them tightly for 5-10 seconds, then release. Move up to your calves, thighs, buttocks, abdomen, chest, arms, hands, neck, and face. Tense each muscle group separately, hold, then release.
- Focus on the sensation: As you release each muscle group, pay attention to the feeling of relaxation. Notice the difference between tension and relaxation.
- Breathe deeply: Throughout the exercise, maintain slow, deep breaths. Inhale as you tense your muscles and exhale as you relax them.
After completing the process, take a moment to enjoy the overall sense of relaxation. You'll likely feel more centered and ready to tackle your exam with a clear mind.
Benefits for Test Anxiety
Numerous benefits arise from practicing Progressive Muscle Relaxation (PMR) before a test. This technique can markedly reduce your anxiety levels, allowing you to approach exams with a calmer mindset. By systematically tensing and relaxing muscle groups, you'll become more aware of physical tension and learn to release it effectively.
PMR can improve your focus and concentration, essential skills for test-taking. As you relax your body, you'll clear your mind of distracting thoughts, enabling better recall of information. Regular practice can also enhance your overall stress management abilities, benefiting you beyond exam situations.
Here's a quick overview of PMR's benefits for test anxiety:
| Physical Benefits | Mental Benefits |
|---|---|
| Reduced muscle tension | Improved concentration |
| Lowered heart rate | Enhanced memory recall |
| Improved sleep quality | Increased self-awareness |
| Better digestion | Greater emotional control |
Practice and Effectiveness Tips
To maximize the benefits of Progressive Muscle Relaxation (PMR) for test anxiety, you'll need to practice regularly and follow some key tips. Consistency is essential, so aim to practice PMR daily, even when you're not feeling anxious.
Find a quiet, comfortable space where you won't be disturbed, and allocate at least 15-20 minutes for each session. As you become more familiar with the technique, you'll be able to perform it more quickly and effectively.
To enhance your PMR practice:
- Focus on your breath throughout the exercise, inhaling deeply as you tense each muscle group and exhaling slowly as you release the tension.
- Visualize the tension leaving your body as you relax each muscle, imagining stress and anxiety flowing out of you.
- Use a guided audio recording or app to help you maintain proper timing and progression through the muscle groups.
Diaphragmatic Breathing Exercise

Diaphragmatic breathing, also known as belly breathing, is a powerful technique to calm your nerves before a test. It's a simple yet effective way to reduce anxiety and improve focus. To practice this exercise, find a comfortable seated position and place one hand on your chest and the other on your belly.
Inhale slowly through your nose, allowing your belly to expand while keeping your chest still. Exhale through your mouth, letting your belly fall. Repeat this process for several minutes, focusing on the rhythm of your breath. Here's a breakdown of the exercise:
| Step | Action | Duration |
|---|---|---|
| 1 | Inhale | 4 seconds |
| 2 | Hold | 2 seconds |
| 3 | Exhale | 6 seconds |
| 4 | Rest | 2 seconds |
As you practice diaphragmatic breathing, you'll notice your heart rate slowing down and your mind becoming clearer. This technique activates your body's relaxation response, countering the effects of stress hormones. You can use this exercise anywhere, anytime you feel test anxiety creeping in. With regular practice, you'll find it easier to tap into this calming state when you need it most.
Standing Side Bend

Stretching your sides can provide immediate relief from test-related tension. The standing side bend is an effective stretch that targets your obliques and intercostal muscles, helping to release the physical stress that often accompanies test anxiety.
To perform this stretch, stand with your feet hip-width apart and your arms relaxed at your sides. Take a deep breath in, and as you exhale, slowly bend to your right side, sliding your right hand down your leg. Reach your left arm up and over your head, creating a gentle arc with your body. Hold this position for 15-30 seconds, breathing deeply.
To maximize the benefits of the standing side bend:
- Keep your hips squared forward and avoid twisting your torso
- Focus on lengthening your side rather than bending forward
- Alternate sides, repeating the stretch on your left side
As you perform this stretch, you'll feel a gentle pulling sensation along the side of your body. This helps to release muscle tension and increase blood flow, promoting a sense of calm and relaxation.
Happy Baby Pose

The Happy Baby Pose offers multiple benefits to combat test anxiety.
You'll find this pose calms your nervous system and releases tension in your lower back, helping you relax before an exam.
Additionally, it improves your breath control, allowing you to manage stress more effectively during the test.
Calms Nervous System
For immediate relief from test anxiety, try the Happy Baby Pose. This gentle stretch calms your nervous system, helping you feel more relaxed and centered before your exam. As you lie on your back and hold your feet, you'll release tension in your lower back and hips, areas where stress often accumulates.
The Happy Baby Pose offers several benefits that can ease test anxiety:
- It activates your parasympathetic nervous system, which triggers your body's relaxation response.
- It promotes deep, slow breathing, which can lower your heart rate and blood pressure.
- It encourages a playful mindset, helping to shift your focus away from exam worries.
To maximize the calming effects, hold the pose for 1-3 minutes while focusing on your breath. You'll notice your mind becoming clearer and your body feeling more at ease.
This pose is particularly effective when combined with other relaxation techniques, such as visualization or positive affirmations. By incorporating the Happy Baby Pose into your pre-exam routine, you're giving yourself a powerful tool to manage test anxiety and approach your exams with greater confidence and composure.
Releases Lower Back Tension
While the Happy Baby Pose calms your nervous system, it's particularly effective at releasing tension in your lower back. This gentle stretch targets the muscles that tighten when you're stressed, helping to alleviate discomfort and improve flexibility.
To perform the Happy Baby Pose:
- Lie on your back with your knees bent.
- Grab the outer edges of your feet with your hands.
- Open your knees wider than your torso, bringing them towards your armpits.
- Gently rock side to side to massage your spine.
Hold this position for 30 seconds to 1 minute, breathing deeply. You'll feel a soothing stretch in your lower back, hips, and inner thighs.
| Benefits | Muscles Targeted | Tips |
|---|---|---|
| Reduces stress | Lower back | Keep your head on the ground |
| Improves flexibility | Hip flexors | Don't force the stretch |
| Relieves lower back pain | Hamstrings | Breathe deeply and slowly |
| Enhances relaxation | Inner thighs | Use a strap if you can't reach your feet |
Improves Breath Control
Practicing Happy Baby Pose offers three key benefits for breath control. This gentle stretch opens your chest and diaphragm, allowing for deeper, more relaxed breathing.
As you lie on your back, grasp your feet and draw your knees towards your armpits. This position naturally encourages slow, deliberate breaths, helping you focus on your breathing rhythm.
To maximize the breath control benefits of Happy Baby Pose:
- Hold the pose for 30 seconds to a minute, concentrating on taking long, deep breaths.
- Gently rock side to side to massage your lower back and further relax your body.
- Close your eyes and visualize your breath flowing smoothly in and out of your body.
Frequently Asked Questions
How Long Before a Test Should I Start Doing These Stretches?
You should start stretching about 10-15 minutes before your test. It's best to incorporate these exercises into your pre-exam routine. Don't wait until the last minute; give yourself enough time to relax and focus.
Can These Stretches Be Done Discreetly During the Exam?
You can subtly perform many anxiety-relieving stretches during an exam. Focus on discreet movements like shoulder rolls, neck rotations, and hand flexes. Breathe deeply while stretching, and avoid drawing attention to yourself or disrupting others.
Are There Any Stretches Specifically for Reducing Brain Fog?
You can try neck rolls, shoulder shrugs, and gentle head tilts to improve blood flow to your brain. Don't forget to take deep breaths while stretching. These simple movements can help clear your mind and reduce fog.
How Often Should I Practice These Stretches for Maximum Benefit?
You'll benefit most by practicing these stretches daily. Aim for 10-15 minutes each morning and evening. If you're feeling particularly foggy, do a quick 5-minute session during the day. Consistency is key for maximum results.
Are There Any Stretches to Avoid if I Have Certain Medical Conditions?
You should consult your doctor before starting any new stretching routine if you have medical conditions. Avoid stretches that aggravate your specific condition. For example, don't do backbends if you've got spinal issues or herniated discs.
In Summary
You've now learned several stretches to help ease test anxiety. Remember, these exercises aren't just for test day. Incorporate them into your daily routine to manage stress better. Don't forget to breathe deeply and stay hydrated. With practice, you'll find these stretches become second nature. They'll help you stay calm and focused, not just during exams, but in other stressful situations too. Keep stretching, stay positive, and ace those tests!
Leave a Reply